The Mr. Coffee KG1 is a relatively low-cost option for someone who wants the occasional cup of coffee
Written and Tested byMark Brezinski, senior writer who's been testing and reviewing products for over a decade.
Updated October 2, 2014
The {{product.name}} is a mid-range pod coffee maker that uses Keurig's K-cup system. If you're just looking for a fast cup of coffee, the {{product.model}} is a good bet, able to produce a cup of coffee in just over two minutes with room temperature water. What the {{product.model}} won't do, however, is give you a particular strong cup of coffee. In our tests, we found each cup of coffee was actually off the charts in terms of weakness and underdevelopment. While this is a problem for most pod coffee makers, the {{product.name}}'s lack of brew customization leaves the user unable to correct for a better cup of coffee.
Recommendations are independently chosen by Reviewed's editors. Purchases made through the links below may earn us and our publishing partners a commission.
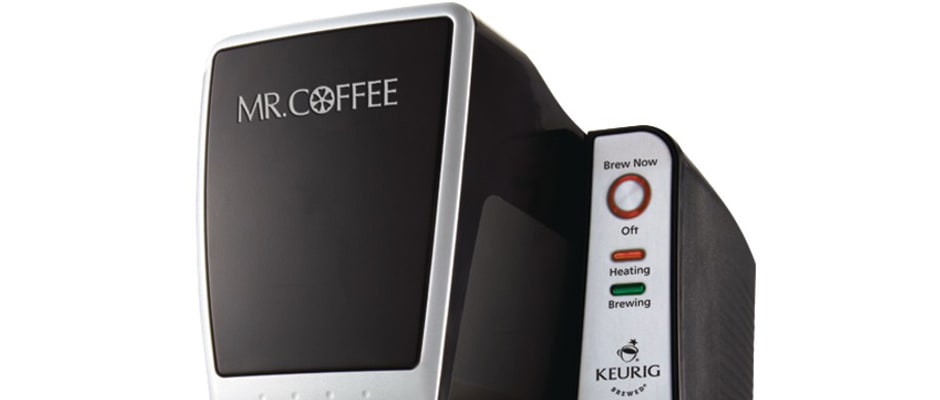
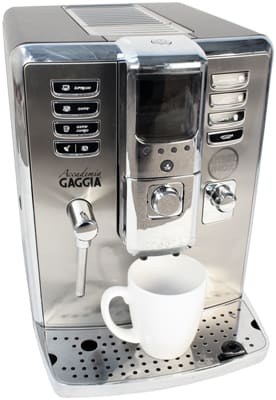
The {{product.name}} is a device that's made for ease of use. There's very little you need to do in order to get the {{product.model}} to start making coffee: insert water, insert coffee grounds, and hit a button. The device also has a fairly sleek design, but we doubt anyone is going to be overly impressed with shiny plastic. Overall, it's a well-built device for its price range, with an aesthetic that will fit in well in just about every kitchen.
The {{product.model}} feature's Keurig's patented brewing chamber design. The small recess will fit one K-cup. Just watch out when you're filling the machine: there's a needle at the bottom to pierce through the K-cup.
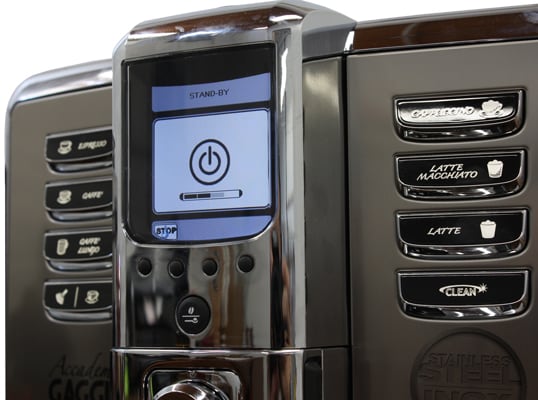
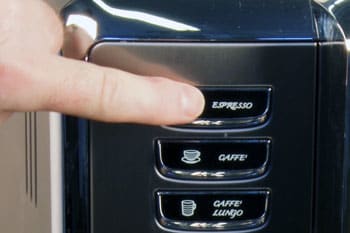
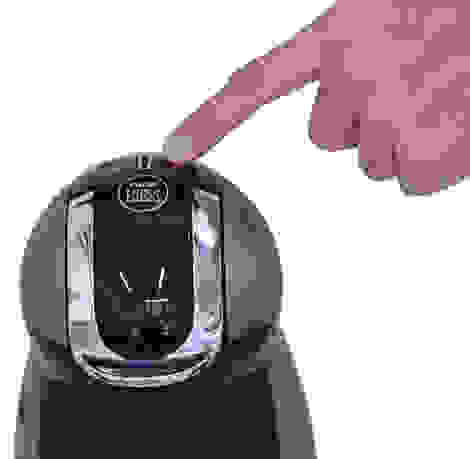
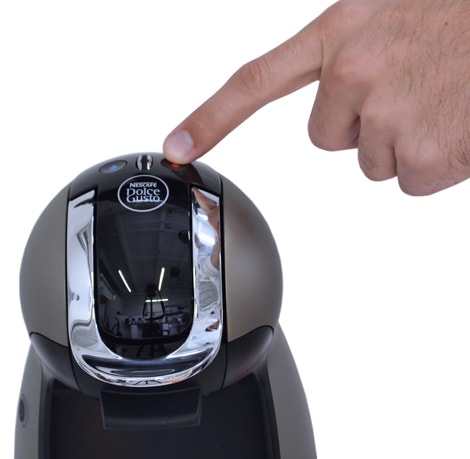
The control panel only has one real control on it: the power button. There aren't any other controls, like a choice of different mug sizes or the ability to fine-tune the strength of the brew.
You'll find the water reservoir on the back side of the machine.
The {{product.name}}'s reservoir is only big enough for the single cup it can brew: about 7.6 ounces (225ml). This means you'll need to refill the reservoir with each cup and you have to wait for it to heat up each time.
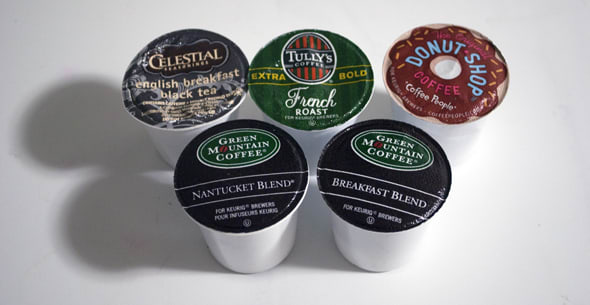
In the box you'll find a sleeve of six K-cups of various flavors. While it isn't strange to find K-cups in your compatible coffee brewer's box, some coffee brewers don't come with any pods included.
While pod coffee systems are fairly quick and convenient, most won't be able to provide a strong cup of coffee. We measured the {{product.name}}'s total dissolved solids at 0.70, which is a bit weak, but not totally out of left field for a Keurig machine. Interestingly enough, this is a stronger cup of coffee than the higher-end Keurig B60 Special Edition brewer.
If you don't need to brew back-to-back cups of coffee and you view caffeinated beverages in a strictly pragmatic way, the {{product.model}} will likely meet your needs. We don't predict, however, this machine will put the local barista out of business. More on how we test the brewing process.
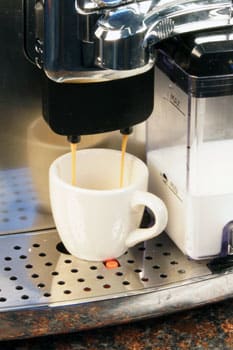
It took 2 minutes and 2 seconds for the {{product.name}} to brew a cup of coffee. While the warm-up time was fairly quick, it took the machine quite a long time to actually dispense the full cup of coffee.
{{comparison_bars title="Time to Brew Smallest Cup Setting", attribute="Time to Brew Minimum", xLabel="Seconds"}}{{comparison_bars title="Time to Brew Largest Cup Setting", attribute="Time to Brew Maximum", xLabel="Seconds"}}
The {{product.model}} only has one recommended fill line, which pours just shy of a standard 8 fl. oz. cup of coffee. The main downside of pod coffee brewers is you don't have a lot of room for customizing your coffee size. Some K-cup machines have multiple settings to accommodate a few different sizes of cup or mug, but that isn't the case with the {{product.model}}
Typically K-cup brewers require you to perform each step in order or else the machine will get confused. The {{product.name}} isn't quite so strict, and will brew coffee as long as the water and grounds are in place.
Step 1
The first step is to turn the machine on. The Brew button should light up orange.
Step 2
Once its on, you'll have to fill the water reservoir up to the indicated line and make sure to close the lid. Unlike other Keurigs, this one has a single-cup reservoir: you'll have to refill it after dispensing each cup.
Step 3
Once you've got the water in, you should put your K-cup into the brewing chamber. Note that you can't open this up properly if the reservoir hatch is open.
Step 4
Once you close the brewing chamber, the machine will start to prepare your coffee. The lights on the control panel will start to fade in and out to indicate if it's heating or brewing the coffee. You'll want to make sure your cup is in place under the dispensing nozzle as soon as you close the brewing chamber, since you have about a minute before the machine starts dispensing coffee.
The {{product.model}} is a pretty easy to clean device, but there are some hard areas. The drip tray is removable, easy to hand wash, and dishwasher safe. The water reservoir, however, isn't removable, and Mr. Coffee recommends you descale the device every three months.
The {{product.name}} is a relatively inexpensive way to get a quick cup of coffee at home. The {{product.name}} focuses more on making multiple cups of coffee, faster, with more size options available. If you need the additional bandwidth, such as in an office, the {{product.name}} is definitely the better pick. If you don't mind having to refill the water tank every cup, or waiting a bit for the brew to boil, the {{product.name}} will suit your needs at a lower price.
The {{product.name}} is a lot less expensive than the {{product.name}}, but it underperforms across the board. While the {{product.model}} is slower than some Keurig machines, the {{product.name}} takes almost twice as long to brew a significantly weaker cup. If you're looking for a bargain, the {{product.name}} will provide the baseline pod coffee experience. If you want a strong cup, you should check out the {{product.model}}.
Conclusion
The {{product.model}} is best seen as a brewer for someone who might want a cup of coffee in the morning before work. If you need multiple cups brewed back-to-back, this brewer will seem very slow. If you're looking for a strong cup of coffee, you'll have to look elsewhere. If you want an entry-level pod brewer because of the reduced hassle, cleanup, and overall wait compared to a traditional drip coffee maker, the {{product.model}} might be a good pick at $89.
Prices were accurate at the time this article was published but may change over time.
The product experts at Reviewed
have all your shopping needs covered.
Follow Reviewed on Facebook,
Twitter,
Instagram,
TikTok,
or Flipboard for the latest deals, product reviews, and more.
Mark Brezinski works on the Home Team, reviewing refrigerators, minifridges, dishwashers, washing machines, dryers, air conditioners, air purifiers, and fans.
Our team is here for one purpose: to help you buy the best stuff and love what you own. Our writers, editors, and lab technicians obsess over the products we cover to make sure you're confident and satisfied. Have a different opinion about something we recommend? Email us and we'll compare notes.