
 Credit:
Getty Images / Kzenon
Credit:
Getty Images / Kzenon

Recommendations are independently chosen by Reviewed's editors. Purchases made through the links below may earn us and our publishing partners a commission.
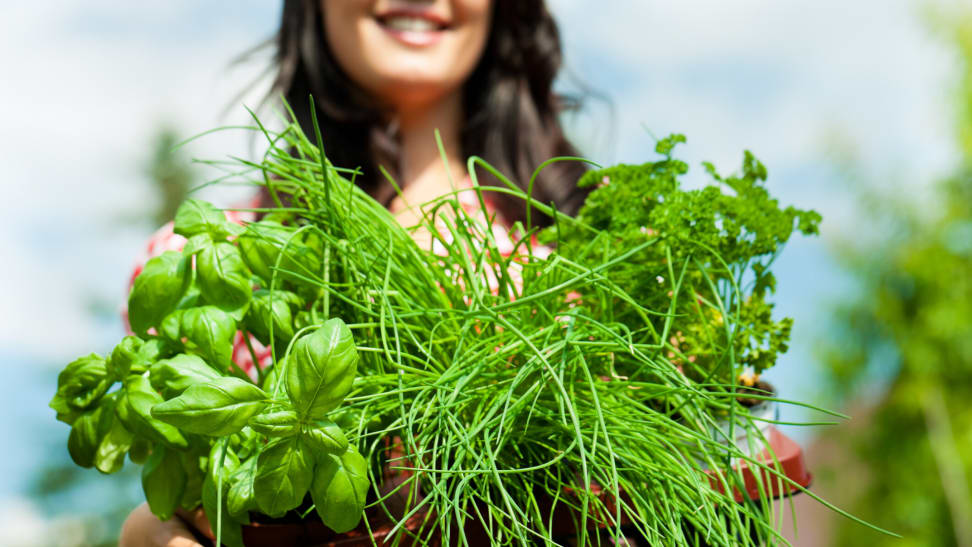
Those of you who have lost a twice-daily office commute over the past months of quarantine have gained extra time at home, even if you don’t shut the laptop as soon as the clock strikes 5. Combine this with a travel-free summer and gorgeous weather, and, well, your daily agenda may have a few—gasp—free spots. So, what are you going to do?
If you’re interested in filling that time with agricultural pursuits like growing fresh berries, fruits, microgreens, and vegetables, but you don’t have the space (i.e. a yard), the know-how, or the attention span to learn, try your hand at growing some fresh herbs instead. You can achieve a similar sense of satisfaction knowing you’ve helped grow—or at least flavor—dinner, not to mention that gardening can help you destress, big time.
First: grow fresh herbs
So, how do you start? Well, by growing some herbs, of course.
“The four easiest herbs to grow at home, on a windowsill or deck, are basil, dill, cilantro, and mint,” says Will Gilson, proprietor of his family-owned farm The Herb Lyceum in Groton, Massachusetts, and co-owner and chef of Puritan & Co. in Cambridge. “Those are very easy ones that are versatile for just about every recipe you’re going to be making.”
Gilson also recommends that home gardeners find a sunny area in their yards to put some wood-framed raised beds filled with really good quality soil. “But, if you are a city dweller,” he says, “things like old dresser drawers or wooden wine boxes work just fine for creating a small herb garden.”
The most simple solution, and one pretty much anyone with a couple dollars can get behind, is to use any clay pot with a hole at the bottom.
Your next step is knowing when to plant the herbs. The optimal growing season depends on two factors: in what kind of climate you live, and what kind of herbs you want to grow.
“Maximizing the summer window for fresh herbs outside is key,” Gilson says. “Annuals grow the best outside in full sun,” and they also typically don’t last for a full growing season.
Annual herbs include dill, basil, and cilantro. “One plant of cilantro that you buy in the spring is not going to get you to the fall, even though that is technically an annual [plant’s] lifespan. Cilantro, and in some instances dill, go to seed very quickly. So, you may have to buy one [plant] three times throughout the summer.”
Perennial herbs do come back year to year, and these include mint, oregano, thyme, lemon verbena, fennel, lavender, rosemary, and sage. However, some of these herbs, like rosemary and lemon verbena, won’t survive more than a mild winter outside, so if you live in a zone with snow, ice, and freezing temps, you’ll have to plant these in containers and move them inside to outside to inside every spring and fall.
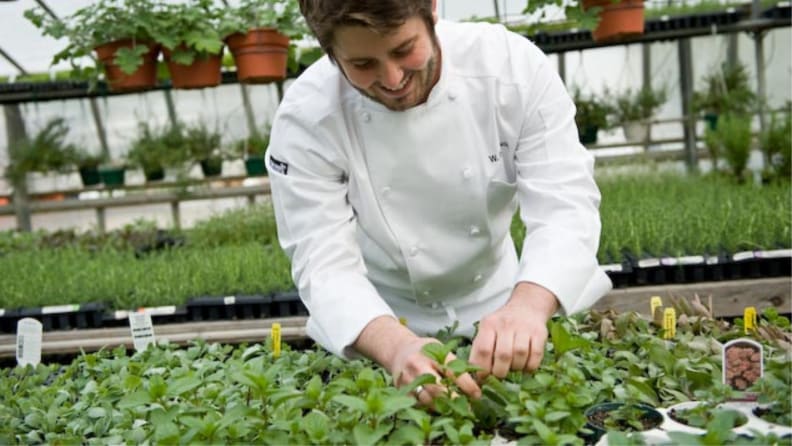
Massachusetts chef Will Gilson works with fresh herbs he grows at The Herb Lyceum in Groton, a farm and event space his family has owned for years.
“In the Northeast, it’s Zone 6, so things like rosemary can’t be planted in the ground and come back every single year,” says Gilson. “You have to put it in a pot, and put it outside in the nice weather. Then, when it gets cold and you’re worrying about frost, you bring it inside for the winter.”
While the great outdoors yields the most flavorful crops, you can still grow herbs successfully indoors all year round.
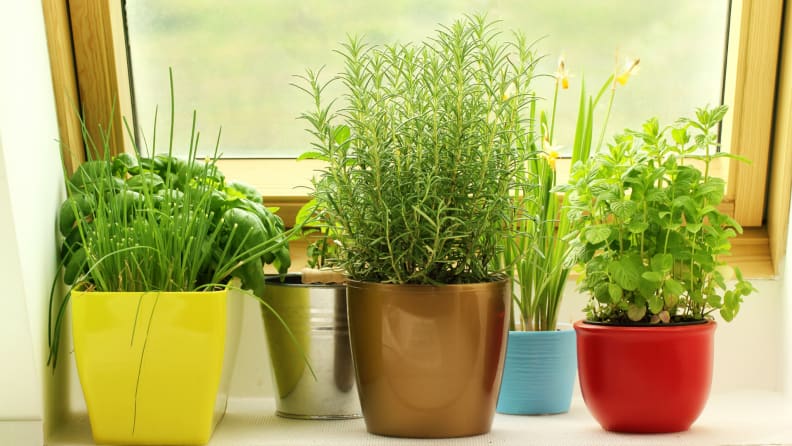
If you live in a colder climate, growing herbs in pots allows you to move them outside during the summer growing season and inside during colder months.
“Everybody loves plant-centric interiors now,” Gilson says. “Herbs make really great houseplants. Rosemary, lavender, sage, thyme: These are all ones you can have inside as statement pieces in your house, in nice pretty pots. They can go on the deck or on the front steps throughout the growing season, and then you can bring them inside in the winter time and be picking from them.”
Gilson does warn, “[Herbs] don’t grow back quite as fast in the wintertime, so if you cut a lot off, it’s not going to grow back as fast as it does in the summer.”
Harvesting fresh herbs
Just like you cut your hair to keep it healthy, you need to do the same for herbs.
Cutting, or pruning, your herbs is not a task to stress over. It’s easy, once you know what to do.
“As they start to get big and tall, you should clip the stem about halfway down the plant where it looks like it is branching out,” Gilson recommends. “You’ll see smaller leaves coming out from the sides. It allows those two smaller branches underneath to start growing out.”
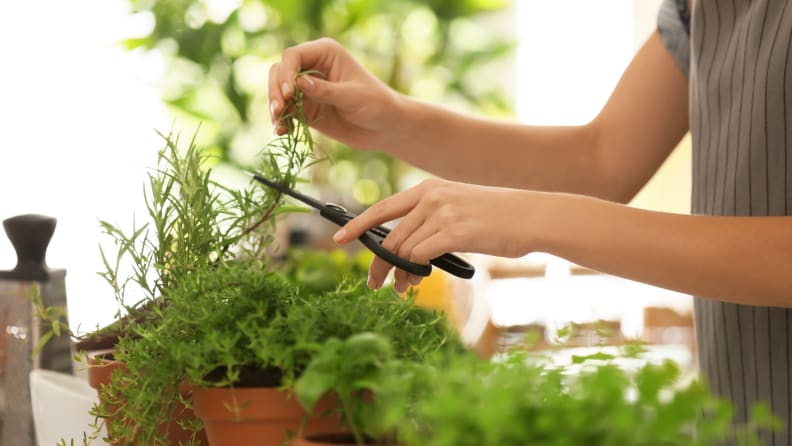
Clipping fresh herbs may seem tricky, but it's not. In fact, it's healthy for the plant, and yields regular crops to flavor your favorite recipes.
He adds, “When herbs are growing fast and plentiful, if you don’t trim them back then they grow straight up, the leaves get brown and hard, and they don’t have as much new growth and flavor.”
Peak pruning time is when the herbs’ oils that are responsible for their flavor and aroma are at their highest.
The typical method for harvesting fresh herbs is pretty cut and dry. Here are a few tips:
- When clipping herbs, use a sharp knife, a finger knife, or pruning shears.
- Notice the herb plant’s foliage and clip it back when the plant has enough to maintain growth and before the plant begins to flower.
- Deadhead foliage to remove flowers—after buds appear, but before they open; this encourages new leaf growth.
- Annual herbs can be cut back 50% to 75%, while perennial herbs can be cut back about 30%.
- Harvest herbs early in the day—after morning dew dries but before temperatures rise too high.
- Clip annual herbs until frost; clip perennial herbs until one month before first frost so that plant has time to harden off.
How to store fresh herbs
After growing and harvesting fresh herbs, you need to figure out what you want to do with them. Do you want to use the herbs immediately to flavor your recipes? Or, would you like to preserve them (by freezing them or drying them) for use throughout the fall and winter?
“You should utilize fresh herbs as much as you can during the growing season, and then, when you get to thinking about the fall and going into the winter, that’s when you should start cutting plants back and drying them and being able to use them as dried herbs through the winter,” Gilson says. “When you’re trying to do preservation, unless you’re worried about an apocalypse, you don’t need much more than six months ahead.”
Short-term storage for immediate use
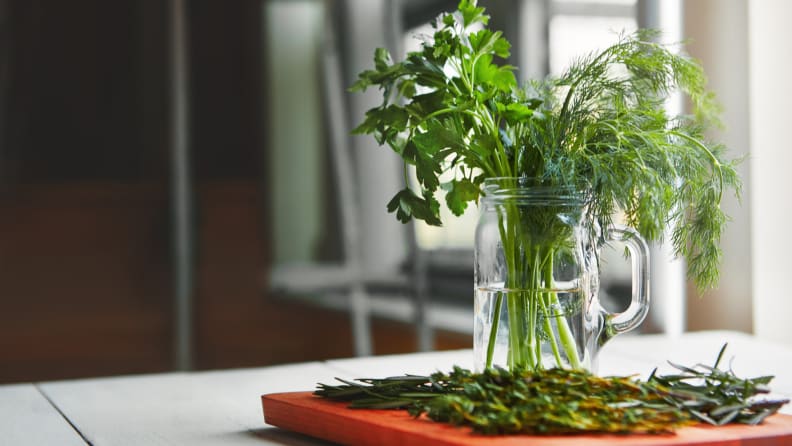
After clipping fresh herbs to use within the week, store them in a glass of water and put it in the fridge.
The Farmer’s Almanac recommends storing fresh-cut, soft-leaf herbs (basil, mint, parsley) like you would any fresh-cut green or flower: in a glass of water. With the exception of basil, which can be left on a table or counter top, pop these “herb bouquets” into your fridge with a plastic baggie loosely placed over it. This method regulates the herb’s moisture levels. Soft herbs will keep this way for a few weeks; you’ll know they’re past their prime when the leaves turn yellow or start to wilt.
Hardier herbs, like rosemary, thyme, and lavender, only need a damp paper towel treatment to keep for one week to a fortnight, according to Lexi Davidson, clean eating expert and founder of popular blog Lexi’s Clean Living. Wrap the herb stalks in a damp paper towel placed inside a plastic bag that’s been punctured with holes, and store it in the fridge. If you have a fridge with a deli drawer and can customize its temperature, even better.
If you’ve got the budget and feel like you need more than a simple DIY method, you can purchase an herb storage container, like this highly-rated breathable glass herb keeper or this herb keeper that’s more compact.
Drying method
Drying is one easy and inexpensive way to preserve herbs for use over colder months.
Have you ever noted the price tag on dried herbs at the supermarket or specialty food store? They’re not cheap. For example, at Whole Foods in the Boston area, the going rate for one ounce of store brand dried oregano leaves is $3.60; at Walmart, dried oregano is much cheaper, but still $2.64 ounce. Pricing for name brands rise from there.
To put it in perspective, a live, perennial oregano plant, costs $4 at The Home Depot. As a perennial, it returns year to year, and it spreads.
So, there are many ways to dry fresh herbs: by air drying or by using a dehydrator, convection oven, or microwave. You don’t want to use a sun drying method for herbs, because they’ll lose their color and flavor during the process.
During a recent Penn State University Extension “Victory Kitchen” webinar, Sharon McDonald, M.Ed., RD, LDN, an educator and food safety specialist, said, “The drying method removes moisture from food so that bacteria, yeasts, and molds can’t grow and spoil the food. It also slows down the action of enzymes.”
The key to drying herbs is to keep the temperature warm—not high—and allow for good airflow.
If you're looking to dry soft herbs like basil or parsley, try a microwave with a wattage of 1,000 or less. Place the herbs in a single layer between paper towels and heat at intervals of 30 seconds.
Penn State's extension program doesn't advocate for using an oven to dry herbs, because it can destroy the properties that make you want to use herbs in the first place: flavor, color, and oils. But, the process can work if you keep the oven very cool—under 180°F, although the optimum temperature is 140°F—at the convection setting, and with the door to the oven open. This process takes about three to four hours.
McDonald says, "One of the things with drying is that you can't rush it. If you try to speed up the drying process by increasing the temperature, what's going to happen is what we call 'case hardening.' This is where the outside of the food becomes dry, but there is moisture still trapped on the inside of the food. As a result, you'll end up with moldy food."
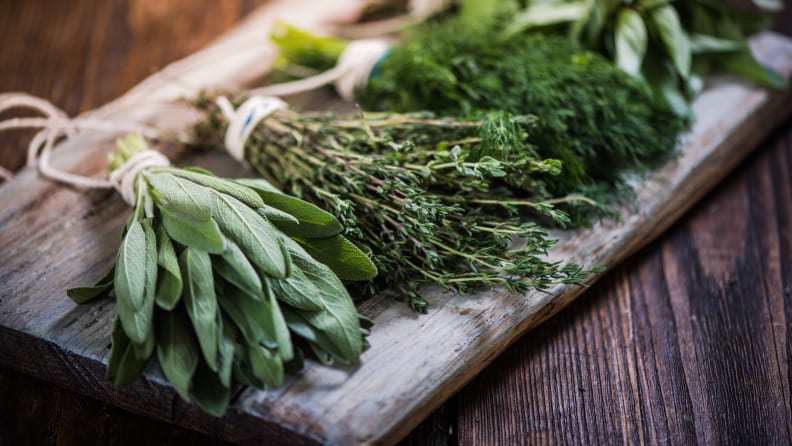
Perhaps the most quaint of all the fresh herb drying methods, air drying conjures images of clusters of rosemary and lavender hanging from wood-beamed ceilings. This vision might look pretty, but it's not how you actually want to proceed. You can hang your herbs, but you want to cover them in paper bags to keep off dust and dirt, and punch the bag with holes to promote good air circulation.
For an easy, DIY air drying method, Gilson recommends, “Focus on your woodier herbs. I always like to put them in a paper bag and put them underneath your sink. The paper bag is going to absorb a lot of the moisture and the leaves will naturally fall off the stems. You can shake the bag and most of the dried herbs will fall to the bottom.”
Herbs that are great for drying include: rosemary, sage, thyme, parsley, basil, mint, lavender.
After the drying process is complete, store the dried herbs in an airtight container, whether it’s Tupperware, small glass Mason jars, takeout deli containers, or even Ziploc bags.
Dried herbs usually hold their flavor for about six months.
Freezing method
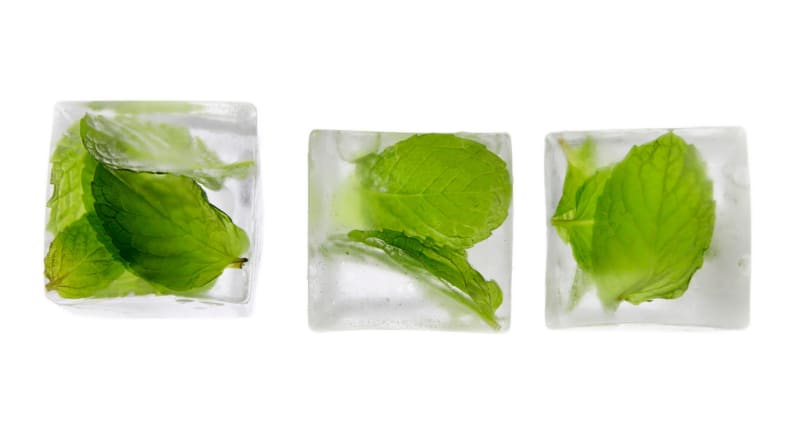
Freezing herbs is another way to preserve them while maintaining their fresh aromas and flavors. Use an ice cube tray and some water to portion them.
Unlike lettuce, you can freeze fresh herbs.
McDonald says, “Freezing is a popular choice for any number of reasons. It takes much less time than canning or drying foods. Freezing inhibits the growth of microorganisms at the freezing temperatures.”
Gilson explains, “The flavor of fresh herbs is what you’re trying to get the most out of.” Freezing maintains a just-grown flavor, more so than drying. If you make a lot of soups, stews, sauces, and pestos, and use fresh herbs in these recipes, then freezing is a good method for you.
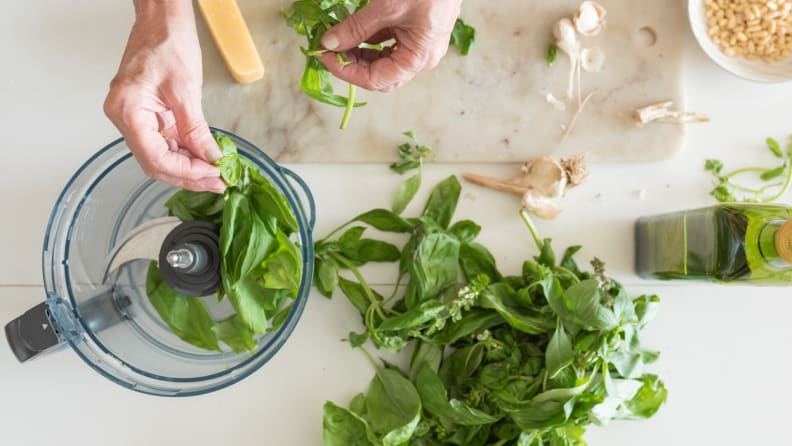
Make sure you wash and dry your fresh herbs first. Then, to puree them, just add a little bit of water to get them moving in the food processor.
“I really enjoy pureeing fresh herbs in a blender or food processor, and then putting them in ice cube trays, which work really well for being able to portion them a little bit at a time.”
You can puree fresh herbs before freezing them.
Once they freeze, you can pop out all the pureed-herb cubes and store them in takeout deli containers or Ziploc bags.
Soft herbs, like cilantro, basil, oregano, fennel, tarragon, and mint, are ideal for purees. Woodier herbs don’t work well. Gilson says, “The leaves are really coarse and no matter how much you put into a blender and try to puree it, it’s not going to puree or you’re just going to make a flavored oil.”