How to install Windows 11 on the Steam Deck
There are more steps than a usual OS installation, but it can be done.
 Credit:
Reviewed / Matthew S. Smith
Credit:
Reviewed / Matthew S. Smith

Products are chosen independently by our editors. Purchases made through our links may earn us a commission.
Installing Windows 11 on Valve's Steam Deck can help you gain full access to your Steam games library, including the titles that are not natively compatible with SteamOS. It also effectively converts the Deck into a full-fledged PC.
However, installing Windows is a multi-step process that can be difficult. We’ve simplified installing Windows on a Steam Deck to make it as approachable as possible.
Before you install Windows 11 on Steam Deck
You will need several items before you can install Windows on the Steam deck.
- A USB drive with at least 16GB of storage. It’s best to use a drive that supports USB 3, as this helps installation proceed quickly.
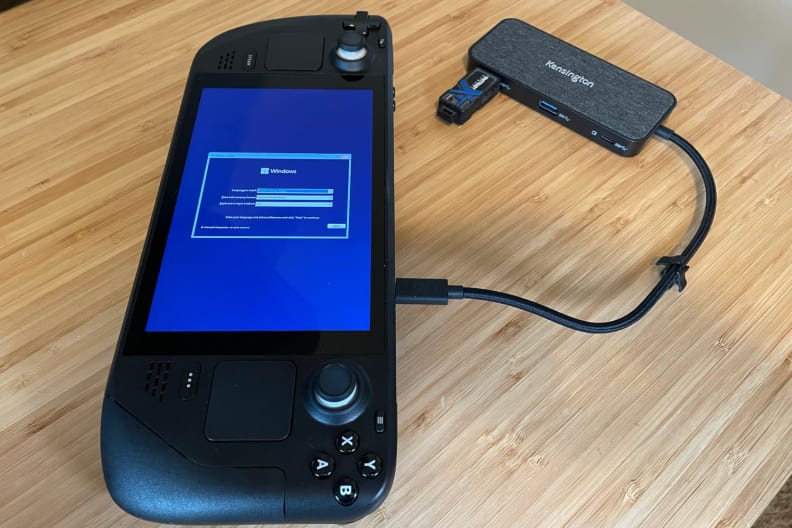
- A USB-C to USB-A hub with at least three USB-A ports.
- A wired USB mouse.
- A wired USB keyboard.
Also, be sure to fully update your Steam Deck before proceeding. Valve has released updates to improve the ease of installing Windows over time. Early Steam Deck models that aren’t updated can not install Windows 11.
Be warned that installing Windows to the Steam Deck will delete your SteamOS install. It’s possible to avoid this through dual-booting, which is addressed at the end of this guide, but that has its own problems, which makes dual-booting less useful.
Since a USB drive is used for installation, the Steam Deck can’t be connected to power during this time unless you are using a powered USB hub or dock like the JSAUX Docking Station or Valve’s official Steam Deck Docking Station. If not, be sure your Steam Deck is charged before you proceed.
Finally, you will need an Internet connection.
How to Install Windows 11 on Steam Deck
Step 1: Download Windows 11 installation media to another PC and run the utility. Run the installation media tool and, when asked which media you wish to use, select “USB flash drive”. Make sure your USB drive is connected to the PC and then select it.
The Windows 11 installation media tool will download Windows and create a bootable Windows 11 installer to the USB drive. This can take some time depending on the speed of your Internet connection.
Step 2: Once the Windows 11 installation media tool has finished, remove the USB drive from your drive and connect it to the Steam Deck.
Step 3: Power off the Steam Deck if it’s not already off.
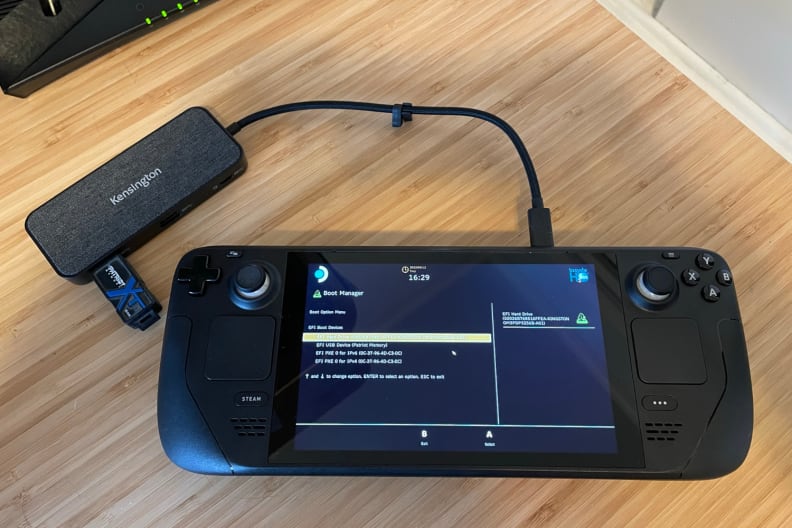
With the Steam Deck off, hold the volume down button, then press the power button. Continue to hold the volume down button until the Steam Deck boot screen appears. This will launch Steam’s Boot Manager.
Step 4: Select the USB drive from the list of boot options.
Step 5: Windows installation will launch. Note that it will be vertically oriented. Choose your language options, then tap next.
Note: Many guides say the touchscreen works during Windows installation, but I did not find that to be the case. I had to use a wired keyboard and mouse through the USB hub.
Step 6: Select Install Now.
Note: In my first attempt, the installer failed to find a hard drive. Restarting the Steam Deck fixed this issue.
Step 7: Activation will appear. Enter a Windows product key if you have one, then select Next. Alternatively, select I don’t have a product key.
Step 8: You’ll be given a choice of Windows versions. We recommend selecting Windows 11 Home. Windows 11 Pro should also work without issue.
Step 9: Accept the license agreement and then select Next.
Step 10: The next screen provides an option to upgrade from a prior version of Windows or install a new version of Windows. Select Install Windows Only.
Step 11: The next step asks where you want to install Windows. The Steam Deck ships with numerous default partitions, none of which are configured to allow a Windows install. Delete Drive 0 Partition 8, the largest, to make room.
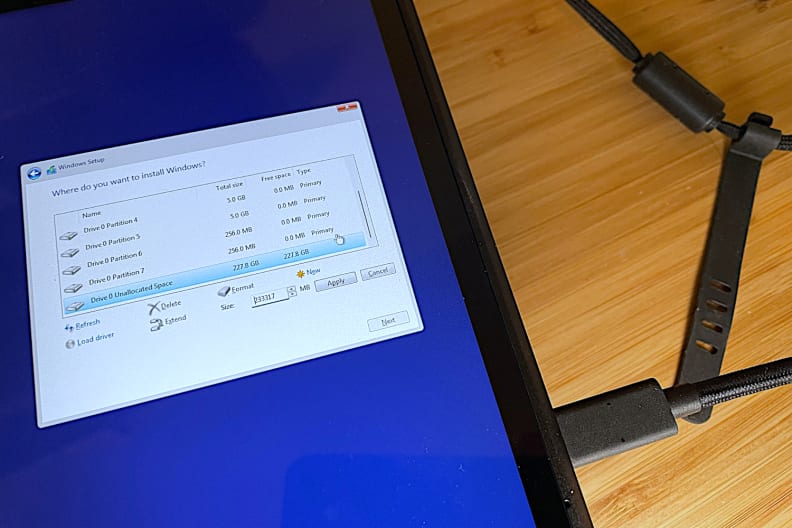
Warning: This will delete your prior SteamOS install. It is possible to reinstall SteamOS later, but the process is just as long as installing Windows. Make sure you want to proceed before you complete this step.
Step 12: Select Drive 0 Unallocated Space, then select New. A field will appear to let you change the size of the partition. There’s no need to change the size, so select Apply.
Step 13: You should now see Drive 0 Partition 9 available. Select it, then tap Next.
Step 14: Windows installation will begin. This will take some time to complete. The Steam Deck will reboot as part of this process.
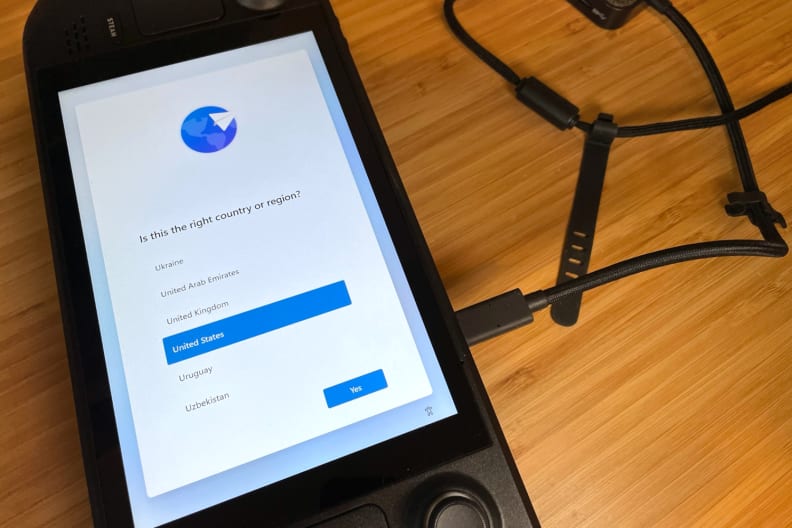
Step 15: You will next see the region selection for Windows 11. Select your region and then tap Yes.
Note: At this point, the USB drive is no longer required, so you can unplug it if desired.
Step 16: You will next see a keyboard layout input selection. Select your layout and click Yes.
Step 17: You’ll be asked if you want to select a second keyboard layout. Most won’t need to do this for the Steam Deck, so select Skip.
Step 18: Now you’ll need to connect to a network. Select a wired or wireless network and then tap Next.
At this point, Windows 11 installation will automatically reboot the Steam Deck.
Note: The automatic reboot hung at this step. I had to re-enter the Steam boot manager by holding the Volume Down button and then hitting the Power button, then selecting the Windows boot partition from the boot manager.
Step 19: Once Windows 11 installation reappears, you’ll need to set up your account. This involves entering a username, password, security questions, and privacy settings. Proceed through these steps.
Windows will complete some final installation updates, which may take a few minutes, and again reboot the Deck.
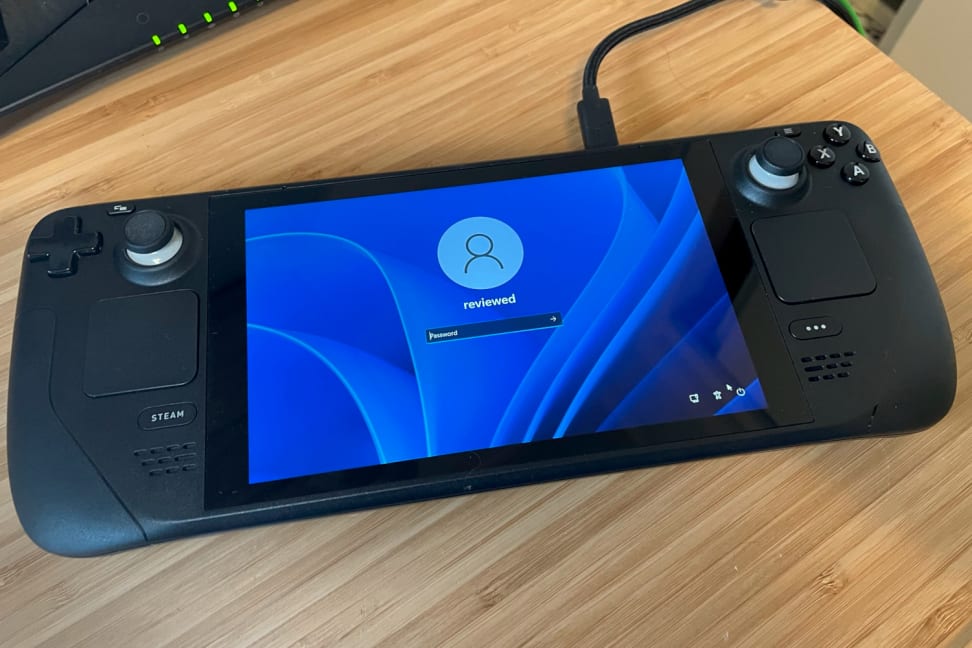
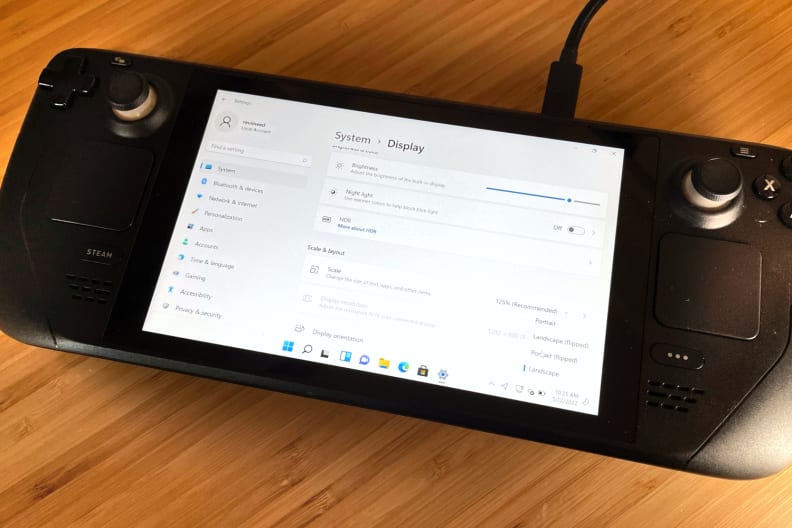
Step 20: You will now see the Windows desktop—but we’re not done yet! The screen is still vertically oriented, so that will need to be fixed.
Select Settings, then Display, and scroll down to Display orientation. Change the orientation from Portrait to Landscape.
Step 21: That’s it! Windows is now installed on your Steam Deck. You can download programs, including Steam, and install them just as if using Windows on any other PC. The first thing you should do is download the correct Windows drivers, including the most recent APU drivers.
Can you dual-boot SteamOS and Windows 11?
It is possible to dual-boot SteamOS and Windows 11. This can be useful since this will let you access the operating system that works best for your needs, but dual-booting is even more complicated and can cause storage issues due to the Deck’s limited hard drive capacity (especially on the entry-level model).
In short, I don’t recommend you attempt this unless you consider yourself an expert hardware enthusiast. If you’re up for it, there are two methods.
The first is to install Windows 11 as a bootable image to a USB drive or a MicroSD card. You can use applications such as Rufus to accomplish this. This is a relatively simple way to dual-boot and has the advantage of not splitting your Steam Deck’s storage space between two operating systems.
However, you’ll have to physically connect the USB drive or MicroSD card when you want to use Windows. Also, game load times may be affected, especially when using a SD card.
Another option is to use Rufus as a separate utility with GParted to set up partitions for each operating system. This also requires a re-install of SteamOS. It’s an extremely complicated process and will split your Steam Deck’s storage between each OS. Windows 11 alone requires about 20GB of storage, and SteamOS consumes about 10GB, so this is not a practical option if you own the 64GB Steam Deck. (It’s best on the 512GB model.) I recommend following Deck Wizard’s YouTube tutorial if you decide to go this route.
If you want to upgrade your Steam Deck’s internal storage to run Windows, iFixit has an excellent guide on upgrading the 2230 NVMe drive up to 1TB. We recommend the 1TB PCIe gen 4 Sabrent Rocket drive; it’s fast and available from a reputable company. Buy the 1TB PCIe gen 4 Sabrent Rocket drive from Amazon