Pros
Cons
Introduction
Design
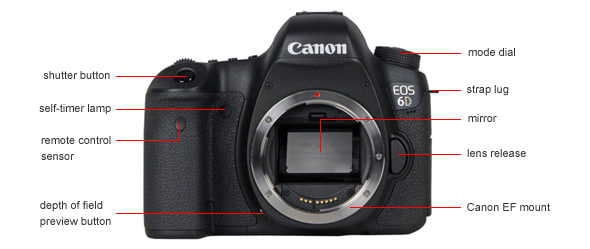
Front
{{section_header}}{{section.name}}{{/section_header}}
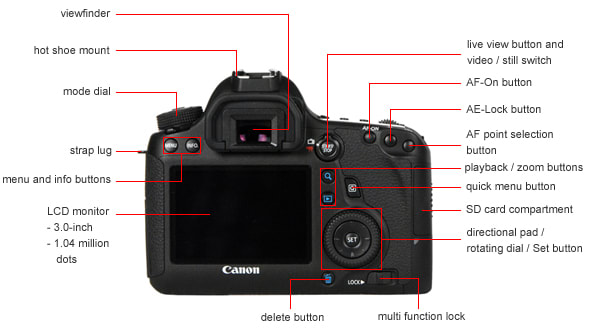
Back
{{section_header}}{{section.name}}{{/section_header}}
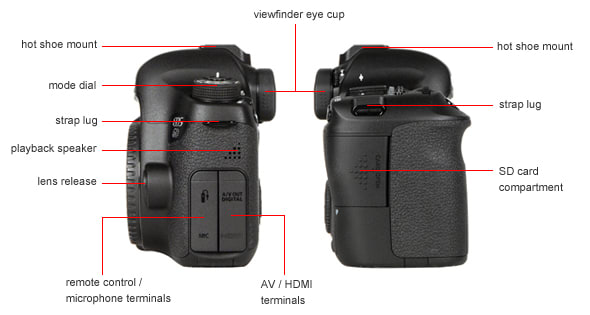
Sides
{{section_header}}{{section.name}}{{/section_header}}
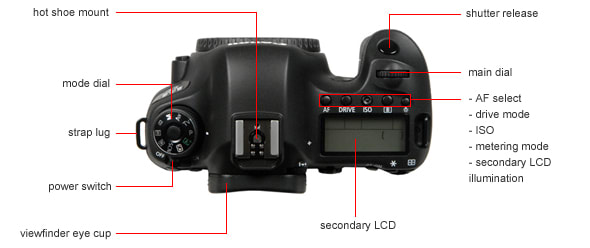
Top
{{section_header}}{{section.name}}{{/section_header}}
Bottom
{{section_header}}{{section.name}}{{/section_header}}

In the Box
{{section_header}}{{section.name}}{{/section_header}}

- Sony A900 body (with body cap)
- NP-FM500H rechargeable battery
- BC-VM10 battery charger
- Wireless Remote Commander with clip
- USB cable
- Video cable
- Shoulder strap
- Software CD-ROM
- Instruction manual
Lens & Sensor
{{section_header}}{{section.name}}{{/section_header}}
The A900 is not sold in a kit configuration. For test purposes we shot primarily with the TK, which produced the following levels of magnification at the minimum, maximum and middle zoom settings.
The full-frame CMOS image sensor measures 35.9 x 24.0 mm, with 25,720,000 gross pixels and 24,610,0000-pixel effective resolution. That puts it ahead of its primary full-frame competitors in The Great Megapixel Race, with the Canon 5D Mark II at 21.1 megapixels and a paltry 12.1 megapixels for the Nikon D700.
The A900 incorporates an automatic dust reduction system that shakes the sensor itself (already motorized to provide in-camera image stabilization) every time you turn off the camera.
The A900 sensor matches the 36 x 24mm dimensions of a frame of 35mm film, which avoids the apparent magnification that takes place when you mount a lens on a typical digital camera, with its smaller image sensor. With a smaller sensor, only the middle portion of the light coming through the lens is captured — basically the center becomes the entire photo. As seen below, the APS-C camera sensor used in most digital SLRs effectively multiplies the apparent lens size by a factor of 1.6. For the 24-105mm mm lens we used to test the A900, it would shoot like a 38-168mm lens. That means more telephoto zoom out of the same lens, but also crops out the wide-angle areas. With the A900 and other full-frame SLRs, you get the full side-to-side, top-to-bottom coverage the lens is capable of delivering.
Viewfinder
{{section_header}}{{section.name}}{{/section_header}}
The viewfinder offers nearly 100% coverage, a true standout feature, with excellent brightness and easy legibility for the data readout. The diopter control (-3.0 to +1.0 m-1) is located on the right of the viewfinder. There's a built-in viewfinder shutter, to prevent light leaking in when shooting on a tripod, a huge convenience compared to mounting a cover manually over the eyepiece. The control for this is on the left of the viewfinder. The A900 supports interchangeable focusing screens, including Type M screens that support very fast lenses and Type L screens that are equipped with a grid pattern.
Beneath the viewfinder are sensors that automatically turn off the LCD monitor when you hold the camera up to your eye.
Display(s)
{{section_header}}{{section.name}}{{/section_header}}
The standard for fine viewing in an upscale digital SLR today is a 3-inch LCD with 921,000-dot resolution, which is precisely what Sony delivers here. It's a handsome display when viewed straight on, though it does begin to gray out noticeably when held away at a moderate angle — not unusable, but not as wide-angle as the Canon 5D Mark II or Nikon D700.
LCD brightness can be adjusted in 11 steps. Sony was clever enough to display a grayscale chart on the brightness adjustment screen, which makes switching settings a lot more meaningful.
The rear screen menu display can be set to one of three modes by pressing the DISP button during shooting. The Detailed Display provides an overview of most camera settings. The enlarged display cuts down on the level of detail, but makes it more readable at a glance.
One handy feature not found in competitive models is the way the A900 automatically senses when the camera is turned vertically (with either side on top) and swaps the screen display orientation to match.
Secondary Display
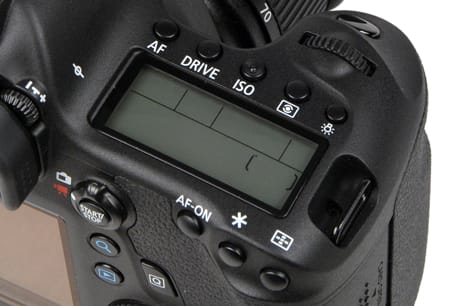
While the main LCD panel is a thing of beauty and a joy forever, the monochrome LCD on the top right seems like a begrudging afterthought. It's small (only about an inch measured diagonally), with a minimal amount of information displayed. At least the button to the screen's right illuminates it effectively.
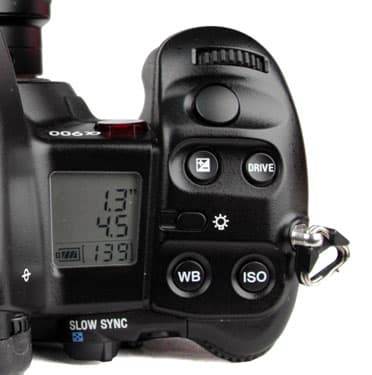
The mono LCD display is small and disappointing.
Flash
{{section_header}}{{section.name}}{{/section_header}}
Sony apparently decided that, in line with its professional-grade features and pricing, they wouldn't include a pop-up flash in the A900 design. We may be snobs in certain regards, but we have to admit that the convenience of having a built-in flash still appeals to us. On the plus side, at least there's a built-in autofocus assist lamp: the Canon EOS 5D Mark II leaves that task to the external flash unit.
Using external flash, six flash modes are supported: Auto, Fill-Flash, Rear Sync, Slow Sync, High Speed Sync, and Wireless.

The flash emitter pops up from the top of the body via a mechanical release.
Connectivity
{{section_header}}{{section.name}}{{/section_header}}
The most noteworthy input/output feature of the A900 is the mini HDMI jack for connecting directly to a high-def TV. It's located on the left side of the camera back, in a compartment that also provides a proprietary jack for standard-definition video and USB data connection.
On the right side of the camera are two additional jacks, under separate covers. The top one is used to connect a wired remote control, the bottom for the optional AC-VQ900AM AC adapter ($150).
There is also a flash sync terminal on the front right of the camera, and an infrared remote sensor on the front camera grip for the included Remote Commander remote control.
Battery
{{section_header}}{{section.name}}{{/section_header}}
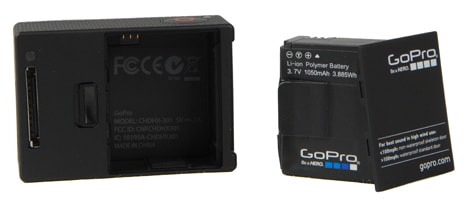
The A900 is powered by a NP-FM500H rechargeable lithium-ion battery. Sony estimates that the maximum number of shots per charge is 880, following CIPA testing standards, which is quite high but seems justified based on our shooting experience: Sony does know how to make high-quality batteries.
Memory
{{section_header}}{{section.name}}{{/section_header}}
Sony loves to sell its proprietary Memory Stick format, but that doesn't mean the realities of the market are lost on them. The A900 will accept both Memory Stick Duo (up to 16-gigabyte capacity) and CompactFlash formats simultaneously.
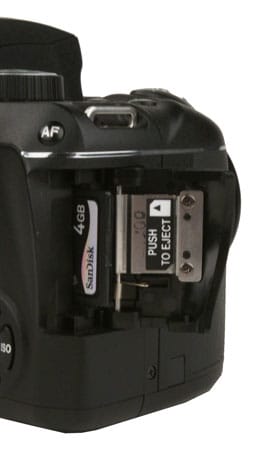
The K2000 accepts inexpensive, easy to find SD cards.
Photo Gallery
{{photo_gallery "Front Photo", "Back Photo", "Sides Photo", "Top Photo", "Bottom Photo", "Viewfinder Photo 1", "Viewfinder Photo 2", "Display Photo 1", "Display Photo 2", "Secondary Display Photo", "Flash Photo", "Lens Mount Photo", "Lens Photo 1", "Lens Photo 2", "Battery Photo", "Memory Photo", "Ports Photo 1", "Ports Photo 2", "Ports Photo 3", "Ports Photo 4", "Ports Photo 5", "Ports Photo 6", "Modes Photo", "Handling Photo 1", "Handling Photo 2", "Handling Photo 3", "Buttons Photo 1", "Buttons Photo 2", "Mic Photo", "Box Photo"}}
Image Quality
Sharpness
{{section_header}}{{section.name}}{{/section_header}}
To test image sharpness, we shoot our test chart at three zoom settings (widest, longest zoom and mid-range), at three focal lengths for each distance. We found that, outfitted with the 24-105mm lens used in our testing, the Sony A900 produced a very good image sharpness result overall, significantly higher than either of its full-frame rivals (the Canon 5D Mark II and Nikon D700). Only the Nikon D90 fared better in our sharpness testing, and not by much of a margin.
At 24mm, the widest lens setting, the image is very sharp in the center, with a maximum lw/ph measurement of 1718 horizontally and 2011 vertically, when shot at f/9. At this zoom length, performance remains strong from corner to corner. More on how we test sharpness.
Image Stabilization
{{section_header}}{{section.name}}{{/section_header}}
The A900 did a decent job of compensating for handshake; we found that with low levels of hand shake, images with the SteadyShot stabilization on were significantly sharper than with it off. However, this was reversed with larger amounts of hand shake; the system made the images slightly less sharp. Most SLRs try and deal with the way your hands shake by moving a small part of the lens, but the A900 takes a different approach; the image sensor is on a moving platform. When the gyroscopes in the camera detect that it is moving because your hands are shaking, this small platform moves to compensate. We test how well a camera deals with hand shake by putting it on a motion control platform, shaking the camera and taking a large number of photos with image stabilization on and off. We also test by moving the camera in both a horizontal (left to right) and vertical (up and down) direction, with two different levels of shake; one low and one high. We then analyze these photos to determine how sharp they are; the better the job the camera does of compensating for the camera movement, the sharper the photos will be. For more details on how this test works, see our How We Test article.
Color
{{section_header}}{{section.name}}{{/section_header}}
In our tests for color accuracy, the Sony A900 was an unimpressive performer compared with other high-end digital SLRs. When set to the color mode that has the least impact on accurate color reproduction, the A900 still had problems reproducing yellow and green values well, and the blues and purples also showed a noticeable color shift. Skin tone reproduction, on the other hand, was quite precise.
Sony gets credit for offering multiple settings to tailor color reproduction to the subject at hand, in the form of Creative Styles (details below). There are 13 of them in all, ranging from the unobtrusive Neutral and Clear to the more aggressive Sunset and Vivid modes. For our color accuracy tests we first shot the X-Rite ColorChecker chart in each available color mode, then analyzed the resulting images using Imatest to determine the setting that produces the lowest color error. That's the mode we use for comparison purposes — for the A900, it turned out to be the Neutral Creative Style. Overall, this produced a color shift of 5.92 and a notable undersaturation at 90.28%. Of course, an undersaturated image offers a little extra flexibility when making adjustments with image editing software, but the color shift is problematic. More on how we test color.
In the chart below we compare actual-size crops from photos of the eighteen color squares on the X-Rite ColorChecker chart taken with five cameras, using the most accurate color setting for each. The leftmost column shows the ideal color values from the original chart.
NOTE: Because of the way computer monitors reproduce colors, the images above do not exactly match the originals found on the chart or in the captured images. The chart should be used to judge the relative color shift, not the absolute captured colors.
The chart below compares overall color scores for each of our comparison cameras. The Sony A900 comes up notably short against the others, with the Canon 5D Mark II offering the best results.
{{comparison_bars title="Color Score Comparison", attribute="Color Score", xLabel="Color Score"}}
Color Modes
{{section_header}}{{section.name}}{{/section_header}}
The Sony A900 offers a Creative Styles feature that tweaks color reproduction to favor the subject at hand. Contrast, saturation, sharpness and brightness are also affected by the choice of Creative Style. You'll find a full discussion of this feature in the Picture Effects section below, in addition to sample images shot at each setting. Here we've chosen five of the most useful options from the thirteen Creative Styles provided and prepared actual-size crops of each color patch taken from photos of the X-Rite ColorChecker chart shot in each mode, for comparison purposes.
As expected in a professional-grade SLR, the Sony A900 supports both the sRGB and Adobe RGB color spaces, the latter useful mainly for commercial printing applications.
White Balance
{{section_header}}{{section.name}}{{/section_header}}
Automatic White Balance ({{product.raw_scores['Auto White Balance Score']}})
The automatic white balance setting produced exceptionally accurate results when shooting under daylight illumination, and also scored well when shooting under fluorescent light. The problem arose under incandescent lights, which produced images that were distinctly over-warm. On balance, though, the A900 scored well here.
Custom White Balance ({{product.raw_scores['Custom White Balance Score']}})
Taking a custom white balance reading effectively solved the problem we'd experienced when shooting under incandescent lights using the automatic white balance system. There were color accuracy improvements under fluorescent and daylight illumination as well, but these were already quite close to ideal values under auto white balance.
Shooting under daylight illumination using auto white balance, all of the cameras produced slightly cool results, though the offsets from the ideal for the Sony A900 and Nikon D700 are trivial.
There is a grim consistency to the inability of automatic white balance systems to cope adequately with incandescent lighting which, considering that's still the source of most household illumination, is profoundly not a good thing. The warming trend is less severe for the Sony A900 than for most of the competition, as shown below, though there's still an uncomfortable orange hue to the images shot on auto.
It's interesting that both Sony and Nikon warm up their images when shooting on auto under fluorescents, while Canon errs in the cooler direction, but not enough that you'd notice without a lab at your disposal.
Taking both automatic and custom white balance accuracy into account, the Sony produces acceptable but not impressive overall results when compared to the other cameras in our roundup. The tests are conducted using a controlled lighting system that produces consistent color temperatures for each illumination setting. Images are analyzed using Imatest, which compares the captured colors to the ideal values from the X-Rite color chart.
{{comparison_bars title="White Balance Score Comparison", attribute="White Balance Score", xLabel="White Balance Score"}}
White Balance Options
{{section_header}}{{section.name}}{{/section_header}}
White balance controls are extensive, if sometimes quirky. In addition to the inevitable auto white balance control, there are six presets, as listed below. Each of these presets can the be fine-tuned to three values above or three values below the default setting. Unfiortunately, there's no clear indication of what effect these fine-tuning maneuvers have on the picture you're taking. A deep dive into the manual turns up the fact that each increment represents 10 Mired. A knowledge of photographic science tells you that the higher the Mired number, the higher the color temperature, but this is all getting a bit obscure. On other high-end cameras with white balance fine-tuning, such as the Canon 5D Mark II, you work with s a visual representation of the color space, moving along the blue-amber and magenta-green axes. This is a more straightforward, comprehensible approach.
Setting a custom white balance is simple enough, and there are three slots to store readings if you want to return to them later. You can also enter the white balance adjustment in degrees Kelvin, or enter the value of a green or magenta color compensation filter, between G9 and M9, with each increment approximately equal to CC filter number 5.
Long Exposure
{{section_header}}{{section.name}}{{/section_header}}
In our long exposure testing, which evaluates both color accuracy and image noise performance at shutter speeds from 1 second to 30 seconds, the Sony A900 scored very well, coming in second only to the Nikon D700 in our comparison group.The camera handled both tests with good results, maintaining a color error below 4 until the camera tipped into overexposure at the 30-second exposure, and average noise well below 1% across the board.
Dropping the lights in our lab down to a level found in a darkened room (20 lux, which is barely bright enough to read by), we set the camera to ISO 400 and shoot the X-Rite test chart at a range of exposure times, from 1 second to 30 seconds. These images are then analyzed using Imatest to measure image noise and color accuracy; for cameras offering long-exposure noise reduction, we run the test twice, with this function on and off.
Both color error and saturation changed very little between shutter speeds when shooting with the Sony A900 until we reached a 30-second exposure, when the shots were overexposed even with the aperture fully stopped down. More on how we test long exposure.
Long-exposure noise reduction seems like a great idea, but it is minimally effective in most of our tests, and sometimes actually makes matters worse. This was the case with the Sony A900; except at the slowest shutter speed, long exposure noise measured higher with noise reduction on, by as much as 20%. The explanation for this counterintutive result? Image noise is by its nature random. Long-exposure noise reduction systems attempt to recreate the noise in the original image by taking a second, shutter-closed exposure and then removing the noise found in the black exposure from the original. Problem is, removing random bits can quite logically do more harm than good.
As shown below, the Sony A900 and Nikon D700 produced substantially superior scores in this test, while the other full-frame camera in the field, the Canon 5D Mark II, scored slightly lower than even the APS-C sensor Canon 50D and Nikon D90.
{{comparison_bars title="Long Exposure Score Comparison", attribute="Long Exposure Score", xLabel="Long Exposure Score"}}
Noise Reduction
{{section_header}}{{section.name}}{{/section_header}}
Noise reduction processing didn't kick in until ISO 800, at which point it provided a substantial improvement over results with noise reduction turned off. The difference between the effects of the three settings, though, was quite small.
The noise trends among individual color channels and luma noise (the noise in gray areas of the photo) are consistent, though noise in the red channel is clearly more a problem for the A900, while yellow and green are better controlled. More on how we test noise.
ISO Options
{{section_header}}{{section.name}}{{/section_header}}
Available ISO settings range from ISO 100 to 6400, all at full resolution, a more modest range than some competing cameras. Both the Canon 5D Mark II and Nikon D700, for example, offer extended-range ISO settings out to 25,600.
Sony doesn't follow the Canon / Nikon route of clearly labeling ISOs that produce less-than-optimal results with non-standard naming conventions (dubbing extended-range settings as L for Low or H for high and leaving ISO numbering off). Sony numbers the complete range but highlights ISOs below 200 and above 3200 with rules above and below in the menu screen. The manual says, 'The available luminosity limits for an image (dynamic range) are a little narrower in the range less than ISO 200. When ISO 3200 or higher is selected, the range is treated as an expanded range and the noise is more noticeable.' As shown in the actual-size image crops below, we don't see a major drop-off in dynamic range below 200, but there's no question image noise explodes when we pass the ISO 3200 mark, and has already jumped upward long before we get to that point.
When set to Auto ISO, you can set a limit to the acceptable ISO range. Five settings are available: 200-400, 200-800, 200-1600, 400-800 and 400-1600.
Dynamic Range
{{section_header}}{{section.name}}{{/section_header}}
The Sony A900 performed very well in our dynamic range testing, bested only by the Canon 5D Mark II. All of our comparison cameras produced similar results at low ISO settings, but dynamic range inevitably declines as ISO increases, and the Sony and Canon maintained levels above 5 stops out to ISO 1600 and well over 4 stops at ISO 3200, which is a very strong result.
We measure dynamic range — the camera's ability to capture detail in both the brightest and darkest areas of an image — by repeatedly shooting a standard grayscale chart at multiple ISO settings, under tightly controlled conditions, then feeding the resulting files to Imatest, which combines the results to determine the overall dynamic range.
At ISO 200, the Sony A900 demonstrates an impressive 7.34-stop dynamic range, which falls off at a reasonable rate as ISO settings increase. More on how we test dynamic range.
Only the Nikon D90 outperformed the Sony at ISO 200. Taking results from all official ISO settings into account to produce an overall score, the Canon 5D Mark II is the strongest performer, but the Sony A900 comes in a respectable second.
{{comparison_bars title="Dynamic Range Score Comparison", attribute="Dynamic Range Score", xLabel="Dynamic Range Score"}}
Noise Reduction
{{section_header}}{{section.name}}{{/section_header}}
Noise reduction processing didn't kick in until ISO 800, at which point it provided a substantial improvement over results with noise reduction turned off. The difference between the effects of the three settings, though, was quite small.
The noise trends among individual color channels and luma noise (the noise in gray areas of the photo) are consistent, though noise in the red channel is clearly more a problem for the A900, while yellow and green are better controlled. More on how we test noise.
ISO Options
{{section_header}}{{section.name}}{{/section_header}}
Available ISO settings range from ISO 100 to 6400, all at full resolution, a more modest range than some competing cameras. Both the Canon 5D Mark II and Nikon D700, for example, offer extended-range ISO settings out to 25,600.
Sony doesn't follow the Canon / Nikon route of clearly labeling ISOs that produce less-than-optimal results with non-standard naming conventions (dubbing extended-range settings as L for Low or H for high and leaving ISO numbering off). Sony numbers the complete range but highlights ISOs below 200 and above 3200 with rules above and below in the menu screen. The manual says, 'The available luminosity limits for an image (dynamic range) are a little narrower in the range less than ISO 200. When ISO 3200 or higher is selected, the range is treated as an expanded range and the noise is more noticeable.' As shown in the actual-size image crops below, we don't see a major drop-off in dynamic range below 200, but there's no question image noise explodes when we pass the ISO 3200 mark, and has already jumped upward long before we get to that point.
When set to Auto ISO, you can set a limit to the acceptable ISO range. Five settings are available: 200-400, 200-800, 200-1600, 400-800 and 400-1600.
Focus Performance
{{section_header}}{{section.name}}{{/section_header}}
The Sony A900 autofocus system uses 9 primary, user-selectable focus points plus 10 supplementary ranging points. Autofocus sensitivity ranges from 0 to 18 EV (at ISO 100). An autofocus illuminator is positioned between the grip and the camera lens. According to Sony, its working range is approximately 3.3 to 23 feet (1 to 7m).
There are three choices when selecting a focus area: Wide, Spot, and Local.
Long Exposure
{{section_header}}{{section.name}}{{/section_header}}
In our long exposure testing, which evaluates both color accuracy and image noise performance at shutter speeds from 1 second to 30 seconds, the Sony A900 scored very well, coming in second only to the Nikon D700 in our comparison group.The camera handled both tests with good results, maintaining a color error below 4 until the camera tipped into overexposure at the 30-second exposure, and average noise well below 1% across the board.
Dropping the lights in our lab down to a level found in a darkened room (20 lux, which is barely bright enough to read by), we set the camera to ISO 400 and shoot the X-Rite test chart at a range of exposure times, from 1 second to 30 seconds. These images are then analyzed using Imatest to measure image noise and color accuracy; for cameras offering long-exposure noise reduction, we run the test twice, with this function on and off.
Both color error and saturation changed very little between shutter speeds when shooting with the Sony A900 until we reached a 30-second exposure, when the shots were overexposed even with the aperture fully stopped down. More on how we test long exposure.
Long-exposure noise reduction seems like a great idea, but it is minimally effective in most of our tests, and sometimes actually makes matters worse. This was the case with the Sony A900; except at the slowest shutter speed, long exposure noise measured higher with noise reduction on, by as much as 20%. The explanation for this counterintutive result? Image noise is by its nature random. Long-exposure noise reduction systems attempt to recreate the noise in the original image by taking a second, shutter-closed exposure and then removing the noise found in the black exposure from the original. Problem is, removing random bits can quite logically do more harm than good.
As shown below, the Sony A900 and Nikon D700 produced substantially superior scores in this test, while the other full-frame camera in the field, the Canon 5D Mark II, scored slightly lower than even the APS-C sensor Canon 50D and Nikon D90.
{{comparison_bars title="Long Exposure Score Comparison", attribute="Long Exposure Score", xLabel="Long Exposure Score"}}
Chromatic Aberration
{{section_header}}{{section.name}}{{/section_header}}
Chromatic aberration refers to the misalignment of red, green and blue pixels, causing a noticeable color fringe along line edges. Shooting with the 24-105mm lens, the Sony A900 produced low levels of chromatic aberration in the middle of the zoom range from edge to edge. At the widest and longest telephoto settings, though, the corners became problematic, producing clearly visible fringing in our sample images. The difficulty wasn't symmetrical, with the most noticeable defects occurring on the horizontal plane on the right side. Of course, there's nothing unique about the trend shown here, but the Sony did underperform compared to the Nikon D90 and D700 outfitted with similarly ranged lenses.
In the middle of the zoom range, maximum vertical resolution falls a bit to 1768 lw/ph, but the horizontal figure stays nearly the same at 1728 lw/ph. There is some softening midway between the center and the corners, but nothing that raises alarms.
Finally, at the full 105mm zoom, as long as the lens is stopped down a bit, the lens maintains very good sharpness, and only really falls off significantly away from the center, when shot with the aperture wide open. Here again, the discrepancy is no more than we'd expect given the settings in effect.
Distortion
{{section_header}}{{section.name}}{{/section_header}}
With the lens at its widest 24mm setting, we measured 2.37% barrel distortion. By the time we zoomed to 70mm the lens switched to pincushion distortion at the 2.17 level, which rose modestly to 2.42% at the longest 105mm zoom. While these levels of distortion would be noticeable, particularly in demanding applications like architectural shooting, they are within an acceptable range for most photographic needs.
Usability
Buttons & Dials
{{section_header}}{{section.name}}{{/section_header}}
The two control dials, one mounted nearly vertically up in front of the shutter, one mounted horizontally just above the thumb rest, work nicely together. There is some confusion about which control handles what setting in some instances. Sometimes either one will do; when setting exposure compensation, for example, or browsing pictures in playback mode. When navigating through the menus, though, the rear control dial takes you from tab to tab, while the front dial moves the cursor vertically through the list of settings. Working with the camera on a regular basis, though, we got used to these idiosyncrasies.
The controller that continued to bother us, though, was the multi-selector, which we're inclined to call a joystick. For changing settings and moving through the menu system, you can use the stick if you like or ignore it and use the wheel controls, which we much preferred. But you can't get away from it entirely, because pressing it in toward the camera body is the equivalent of an OK button, which we found uncomfortable to maneuver (especially when we were in a hurry) and imprecise.
Menu
{{section_header}}{{section.name}}{{/section_header}}
There are basically two parts to the Sony A900 menu system: the traditional tabbed on-screen display you bring up by pressing the Menu button, and the Quick Navi screen, which makes all the settings displayed on the full-screen LCD information display changeable by pointing, clicking and scrolling.
The back information display toggles between two levels of detail by pressing the DISP button (it can also be turned off entirely in the same way). At either detail setting, pressing the Fn button makes this screen interactive. An orange highlight shows which setting is active — the highlight can be moved using the joystick. As for changing the highlighted setting, you can scroll through the available choices sequentially by rotating either control dial, or press the joystick in and opening up a menu screen of choices.
One smart feature in the on-screen menu system is the fact that all settings available on a page are immediately visible, without having to scroll down to discover them. Each menu section — Recording, Custom, Playback and Setup — consists of multiple pages. Turning the rear control dial or pushing the joystick horizontally moves directly from page to page. Turning the front control dial or pushing the joystick vertically moves up and down the menu pages, scrolling to the next page in order if you continue beyond the bottom of the current page.
Instruction Manual
{{section_header}}{{section.name}}{{/section_header}}
The camera instruction manual is quite small, which is handy if you want to carry it in your pocket, but does lead to squint-inducing type sizes. The material is well organized, written clearly and adequately illustrated. There are lots of cross-references to other relevant sections as you work your way through the manual, which makes up for an index that could be more complete.
Software documentation is handled entirely through the individual applications' help system. We would have preferred some kind of printed (or even disk-based) quick-start guide, but the writing and presentation are clear enough to making the learning process smooth, especially if you have enough screen space to keep both the program and the on-screen instructions visible simultaneously.
Handling
{{section_header}}{{section.name}}{{/section_header}}
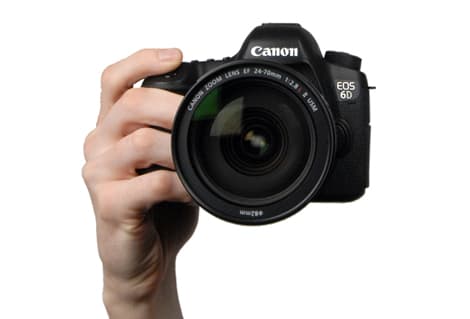
The Sony A900 is a bulky piece of gear, good for building up the forearms but not the kind of camera you're likely to casually carry along just in case a photo opportunity happens to pop up. The body alone weighs nearly two pounds (30 oz., or 850g) and measures 6.25 x 3.25 x 4.63 inches (156.3 x 81.9 x 116.9mm). We did most of our shooting with the relatively modest-sized 25-105mm zoom, which adds another 14 oz. (395g) to the party. We also tried out one of Sony's premium lenses, the 16-35mm Carl Zeiss wide-angle zoom, a lovely $1800 construction for shooting close-ups that happens to weigh as much as the camera body itself.
Of course, you expect full-frame cameras in this class to be hefty (the Sony body outweighs the Canon 5D Mark II by just over an ounce. but is actually lighter than the Nikon D700). The real question is, how well does the camera handle when you're shooting? And the answer here is, OK, but not great.
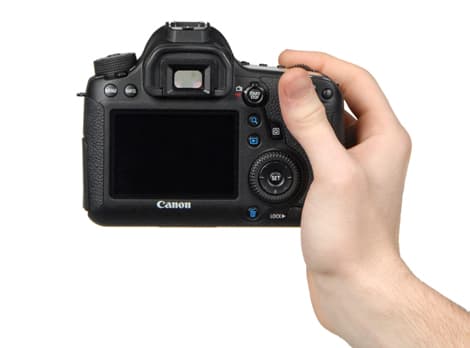
On the plus side, the LCD information displays rotate automatically from horizontal to vertical when you pivot the camera (vertical in either direction, it should be noted). And while this behavior can be defeated with a menu setting, we found it enormously helpful. The camera grip is nicely cushioned and textured, and there's a useful thumb rest at the top back to help balance the load, but the positioning isn't quite right. Either we kept the tip of our thumb on the rest, which keeps you from wrapping your fingers firmly around the front grip, or the thumb rest balanced against the thumb joint, which means the tip of your thumb cruises up against the metering and multi-selector controls. The balance isn't ideal either: holding your index finger over the shutter, located quite near the right-hand edge of the camera, again pushes the meaty part of your hand away from the grip. And if you need to reach the top buttons for exposure compensation, drive mode, white balance and ISO setting, you're going to have to reposition the camera entirely to gain access.
Buttons & Dials
{{section_header}}{{section.name}}{{/section_header}}
The two control dials, one mounted nearly vertically up in front of the shutter, one mounted horizontally just above the thumb rest, work nicely together. There is some confusion about which control handles what setting in some instances. Sometimes either one will do; when setting exposure compensation, for example, or browsing pictures in playback mode. When navigating through the menus, though, the rear control dial takes you from tab to tab, while the front dial moves the cursor vertically through the list of settings. Working with the camera on a regular basis, though, we got used to these idiosyncrasies.
The controller that continued to bother us, though, was the multi-selector, which we're inclined to call a joystick. For changing settings and moving through the menu system, you can use the stick if you like or ignore it and use the wheel controls, which we much preferred. But you can't get away from it entirely, because pressing it in toward the camera body is the equivalent of an OK button, which we found uncomfortable to maneuver (especially when we were in a hurry) and imprecise.
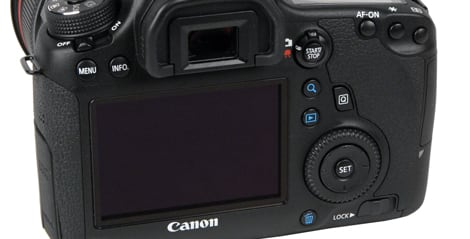
We were less than thrilled with the positioning of the exposure compensation, drive mode, white balance and ISO buttons on top of the camera. There's really no convenient or comfortable way to press them: they require you to remove your finger from the shutter button, and move your hand and/or the camera substantially to push a button.
Display(s)
{{section_header}}{{section.name}}{{/section_header}}
The standard for fine viewing in an upscale digital SLR today is a 3-inch LCD with 921,000-dot resolution, which is precisely what Sony delivers here. It's a handsome display when viewed straight on, though it does begin to gray out noticeably when held away at a moderate angle — not unusable, but not as wide-angle as the Canon 5D Mark II or Nikon D700.
LCD brightness can be adjusted in 11 steps. Sony was clever enough to display a grayscale chart on the brightness adjustment screen, which makes switching settings a lot more meaningful.
The rear screen menu display can be set to one of three modes by pressing the DISP button during shooting. The Detailed Display provides an overview of most camera settings. The enlarged display cuts down on the level of detail, but makes it more readable at a glance.
One handy feature not found in competitive models is the way the A900 automatically senses when the camera is turned vertically (with either side on top) and swaps the screen display orientation to match.
Secondary Display
While the main LCD panel is a thing of beauty and a joy forever, the monochrome LCD on the top right seems like a begrudging afterthought. It's small (only about an inch measured diagonally), with a minimal amount of information displayed. At least the button to the screen's right illuminates it effectively.

The mono LCD display is small and disappointing.
Viewfinder
{{section_header}}{{section.name}}{{/section_header}}
The viewfinder offers nearly 100% coverage, a true standout feature, with excellent brightness and easy legibility for the data readout. The diopter control (-3.0 to +1.0 m-1) is located on the right of the viewfinder. There's a built-in viewfinder shutter, to prevent light leaking in when shooting on a tripod, a huge convenience compared to mounting a cover manually over the eyepiece. The control for this is on the left of the viewfinder. The A900 supports interchangeable focusing screens, including Type M screens that support very fast lenses and Type L screens that are equipped with a grid pattern.
Beneath the viewfinder are sensors that automatically turn off the LCD monitor when you hold the camera up to your eye.
Image Stabilization
{{section_header}}{{section.name}}{{/section_header}}
The A900 did a decent job of compensating for handshake; we found that with low levels of hand shake, images with the SteadyShot stabilization on were significantly sharper than with it off. However, this was reversed with larger amounts of hand shake; the system made the images slightly less sharp. Most SLRs try and deal with the way your hands shake by moving a small part of the lens, but the A900 takes a different approach; the image sensor is on a moving platform. When the gyroscopes in the camera detect that it is moving because your hands are shaking, this small platform moves to compensate. We test how well a camera deals with hand shake by putting it on a motion control platform, shaking the camera and taking a large number of photos with image stabilization on and off. We also test by moving the camera in both a horizontal (left to right) and vertical (up and down) direction, with two different levels of shake; one low and one high. We then analyze these photos to determine how sharp they are; the better the job the camera does of compensating for the camera movement, the sharper the photos will be. For more details on how this test works, see our How We Test article.
Shooting Modes
{{section_header}}{{section.name}}{{/section_header}}
The shooting mode selection is fairly stripped-down on the Sony A900, without any fancy choices meant to coddle newbies (or make it easier for you to hand your camera to a friend for the occasional snapshot). The Auto mode is a bit unusual, since it provides a great deal of flexibility.
Focus
{{section_header}}{{section.name}}{{/section_header}}
The Sony A900 autofocus system uses 9 primary, user-selectable focus points plus 10 supplementary ranging points. Autofocus sensitivity ranges from 0 to 18 EV (at ISO 100). An autofocus illuminator is positioned between the grip and the camera lens. According to Sony, its working range is approximately 3.3 to 23 feet (1 to 7m).
There are three choices when selecting a focus area: Wide, Spot, and Local.
Recording Options
{{section_header}}{{section.name}}{{/section_header}}
The Sony A900 can shoot at three aspect ratios: the native 3:2 format, widescreen 16:9 and a reduced-resolution APS-C size capture for use when a lens designed for a smaller sensor size is attached.
JPEG images can be saved at three compression settings: Extra Fine, Fine and Standard. In addition, there are two RAW file formats available, a straight RAW file and a compressed RAW (cRAW) which will be about 60-70% the size of an uncompressed RAW file. Either RAW format can also be shot as RAW + JPEG, with a Large-size JPEG stored simultaneously.
Speed and Timing
{{section_header}}{{section.name}}{{/section_header}}
The Sony A900 utilizes dual processors and an innovative shutter design to deliver an outstanding continuous shooting burst rate considering the tremendous file sizes involved.
The Sony A900 offers two continuous-shooting settings; Hi shoots at a maximum of 5 frames per second, Lo shoots at a maximum 3 images per second. When shooting in Extra fine mode, up to 11 images can be captured in a burst, which climbs to 105 in Fine mode and 285 in Standard. Surprisingly, up to 12 RAW files can be captured continuously, slightly more than Extra fine JPEGs.
Sony claims a top burst-mode speed of 5 frames per second. We achieved an average of 4.44 in our lab testing, which is none too shabby, beating the only other camera producing 20+-megapixel images (the Canon 5D Mark II) by a healthy margin.
The Sony A900 offers basic self-timer functionality: 2 second and 10 second. The handheld Remote Commander wireless control also includes a 2-second self-timer release button.
Focus Speed
{{section_header}}{{section.name}}{{/section_header}}
The Sony A900 autofocus system uses 9 primary, user-selectable focus points plus 10 supplementary ranging points. Autofocus sensitivity ranges from 0 to 18 EV (at ISO 100). An autofocus illuminator is positioned between the grip and the camera lens. According to Sony, its working range is approximately 3.3 to 23 feet (1 to 7m).
There are three choices when selecting a focus area: Wide, Spot, and Local.
Features
Other Features
{{section_header}}{{section.name}}{{/section_header}}
Remote Commander
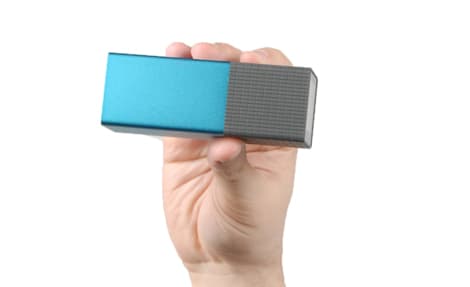
Most SLRs are compatible with wireless remote controls, but this is the only one we can remember that actually ships with a fully functional remote as a standard feature rather than an added-cost option. The Remote Commander is small — roughly 3.6 x 1.6 x 0.4 inches (91.4 x 40.6 x 10.2mm) — and easily pocketable. It's useful while shooting, of course, with both an immediate shutter release and 2-second timer button (when the camera is set to Bulb, either button starts the exposure with a press, and stops it with a second press). In playback mode, the remote offers nearly all the functions found on the camera itself, including browsing from image to image, enlarging and reducing image display, starting a slideshow and even bringing up a histogram overlay. This capability is great if you've connected your camera to a TV and want to show off your photos in style from across the room.
In the Box
{{section_header}}{{section.name}}{{/section_header}}

- Sony A900 body (with body cap)
- NP-FM500H rechargeable battery
- BC-VM10 battery charger
- Wireless Remote Commander with clip
- USB cable
- Video cable
- Shoulder strap
- Software CD-ROM
- Instruction manual
Meet the tester

Steve Morgenstern
Editor
Steve Morgenstern is a valued contributor to the Reviewed.com family of sites.
Checking our work.
Our team is here to help you buy the best stuff and love what you own. Our writers, editors, and experts obsess over the products we cover to make sure you're confident and satisfied. Have a different opinion about something we recommend? Email us and we'll compare notes.
Shoot us an email