Pros
Cons
Introduction
Still, with subtle improvements to image quality over the GF1 and a bevy of customizable options, the GF2 is no slouch. It can be a very capable camera when put in the right hands—whether those hands are that of an amateur stepping up in quality or an enthusiast stepping down in size.
The Panasonic GF2 is available in pink, white, silver, red and the black you see pictured here. It will be available at an MSRP of $499 body-only, $599 with the 14-42mm f/3.5-5.6 lens, or $699 with the 14mm f/2.5 lens that we tested with.
Design
Front
{{section_header}}{{section.name}}{{/section_header}}
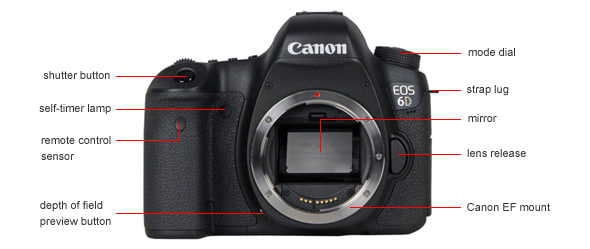
Back
{{section_header}}{{section.name}}{{/section_header}}
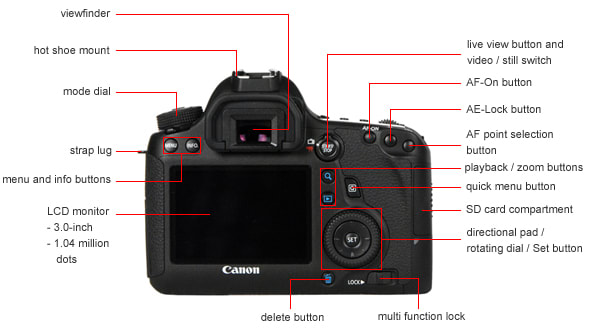
Sides
{{section_header}}{{section.name}}{{/section_header}}
Top
{{section_header}}{{section.name}}{{/section_header}}
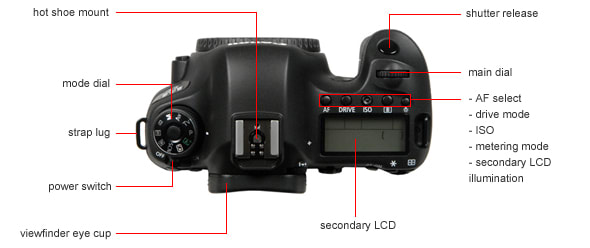
Bottom
{{section_header}}{{section.name}}{{/section_header}}

In the Box
{{section_header}}{{section.name}}{{/section_header}}

Depending on which kit you choose the camera will come with a 14mm F/2.5 pancake lens and/or 14-42mm f/3.5-5.6 lens, as well as:
- USB Cable (proprietary)
- A/V Cable (proprietary)
- Neck Strap
- DMW-BLD10PP Lithium Ion Battery
- Battery Charger
- Body Cap/Lens Cap(s)
- Hot Shoe Cover
- Manuals
- Software
Lens & Sensor
{{section_header}}{{section.name}}{{/section_header}}
The Panasonic GF2 features a 12-megapixel Live MOS sensor that attempts to re-engineer the way that information is processed off a typical CMOS sensor, resulting in lower power requirements and less noise. This technology is nothing new; the biggest gains the GF2 makes in terms of noise reduction come from post-production and image processing rather than the sensor itself.
This particular sensor is starting to show its age, but it can still hold its own against the APS-C sensors of the Sony NEX-5 and Samsung NX100.
While many people were hoping for an increase in picture resolution with the GF2, 12 megapixels are more than sufficient to print 8.5×11′’ prints at 300dpi while still being able to crop.
Overall results are similar to the GF1, with the majority of the changes coming in how the GF2 processes what the sensor gives it—rather than the sensor performing better on its own.
Viewfinder
{{section_header}}{{section.name}}{{/section_header}}
The GF2 does not come with a viewfinder, but does support an optional electronic viewfinder by its rear port and hot shoe.
Display(s)
{{section_header}}{{section.name}}{{/section_header}}
The LCD is a 3-inch 460k touchscreen LCD. It is sharp enough to pick up some fine details and confirm focus, though it does tend to oversaturate a little. Saturation can be turned down in the menu along with contrast, brightness, and red/blue tint. There are four available brightness settings.
The touch LCD works well and is as responsive as most other digital camera touchscreens. You shouldn’t expect tablet-level control here, but it’s functional and the buttons are large enough that it’s rare to have any real control issues. The LCD is only barely visible in direct sunlight—not uncommon among LCDs.
Flash
{{section_header}}{{section.name}}{{/section_header}}
The pop-up flash has not been changed since the GF1, with the flash release still in the familiar back-left position on the camera. The flash will not fire unless manually released. It is not particularly powerful, but it’s enough to illuminate a subject well from about 10 feet. Be warned: like most built-in flashes, it is a rather harsh light.
The GF2 comes with six flash modes: auto, auto red-eye reduction, forced, forced red-eye reduction, slow sync, and slow sync red-eye reduction.

The flash emitter pops up from the top of the body via a mechanical release.
Connectivity
{{section_header}}{{section.name}}{{/section_header}}
The GF2 has a proprietary USB/AV port and a mini-HDMI port— both on the camera’s right side behind a plastic flap. The GF2 will output through HDMI in playback mode only.
Battery
{{section_header}}{{section.name}}{{/section_header}}
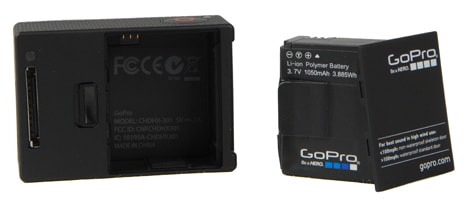
The supplied battery is a Panasonic DMW-BLD10PP Lithium-ion battery. Panasonic claims it will last approximately 200 shots under normal use. We were able to get around that many with ease. The GF2 comes with a charging station, which requires the battery to be removed from the camera for charging. The GF2 can be run when plugged directly into a power outlet, but that requires two separate adapters that need to be purchased separately.
Panasonic implements a system that discourages the use of third-party batteries. You’ll have to shell out a little more for your Panasonic brand batteries.
Memory
{{section_header}}{{section.name}}{{/section_header}}
The GF2 supports SD/SDHC/SDXC memory cards with a maximum of 64GB per card.
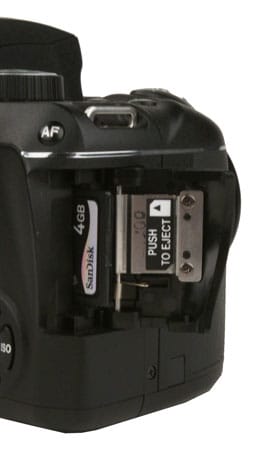
The K2000 accepts inexpensive, easy to find SD cards.
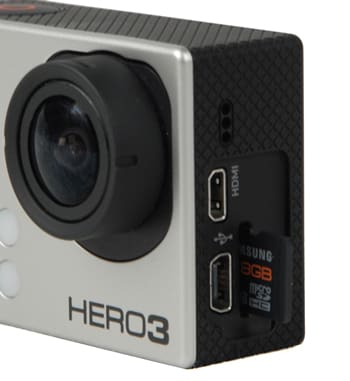
Photo Gallery
{{photo_gallery "Front Photo", "Back Photo", "Sides Photo", "Top Photo", "Bottom Photo", "Viewfinder Photo 1", "Viewfinder Photo 2", "Display Photo 1", "Display Photo 2", "Secondary Display Photo", "Flash Photo", "Lens Mount Photo", "Lens Photo 1", "Lens Photo 2", "Battery Photo", "Memory Photo", "Ports Photo 1", "Ports Photo 2", "Ports Photo 3", "Ports Photo 4", "Ports Photo 5", "Ports Photo 6", "Modes Photo", "Handling Photo 1", "Handling Photo 2", "Handling Photo 3", "Buttons Photo 1", "Buttons Photo 2", "Mic Photo", "Box Photo"}}
Image Quality
Sharpness
{{section_header}}{{section.name}}{{/section_header}}
The GF2 produced the sharpest results of any of our cameras in the test group. The fact that it was the only prime lens certainly played a role here, though the GF1—tested with the Panasonic 14-42mm lens—also produced very sharp images.
The images get particularly soft at smaller apertures, but with the lens opened all the way up the images stay nice and crisp. This is true even at the edges, where the other cameras in our test group produced softer lines.
We only tested for sharpness at the wide focal length—since that is the only kit lens we had available. Overall sharpness was very good, as is to be expected of a prime lens. The images became much softer around the edges at smaller apertures, but the GF2 was still at the top of our comparison group. More on how we test sharpness.
Image Stabilization
{{section_header}}{{section.name}}{{/section_header}}
We have not tested image stabilization for the DMC-GF2, as neither the camera nor the pancake kit lens (14mm f/2.5) feature image stabilization. The optional 14-42mm f/3.5-5.6 kit lens available with the GF2 will stabilize, as will other Micro Four-Thirds lenses.
Color
{{section_header}}{{section.name}}{{/section_header}}
The GF2 fared well in our color accuracy tests in bright light. Its performance was about on par with what we’ve seen in other Micro Four-Thirds cameras. It handled browns and greens very well. There were slight issues with blues and purples, where the most extreme color inaccuracies were seen. More on how we test color.
In our tests we look for how accurate a camera can be in producing specific colors under controlled conditions. With the absolute glut of image processing programs out there, you can alter an image in any specific way you choose. However, reproducing accurate colors from an inaccurate image is akin to attempting to put the genie back in the bottle.
The GF2 does sacrifice color accuracy somewhat compared to the GF1. This seems to be due to the camera’s JPEG compression method, which smears out a good deal of noise. When you look at the RAW files, the colors appear noisier, but far more accurate—though we only score using a camera’s JPEG compression.
NOTE: Because of the way computer monitors reproduce colors, the images above do not exactly match the originals found on the chart or in the captured images. The chart should be used to judge the relative color shift, not the absolute captured colors.
The GF2 took a slight drop overall from the GF1 in terms of accuracy, but outpointed the NEX-5 and Samsung NX100 by the same margin. The clear winner is the Olympus E-P1. That camera scored far above all the other cameras in our test group.
Much of this difference can be explained away by each camera’s post-processing, as we use the in-camera JPEG compression for testing each camera. There are very visible differences in the color accuracy between the RAW image and JPEG image out of the camera: the GF2 struggled particularly with blues and purples in this test.
Noise reduction also plays a part here, as the E-P1 seems to skew colors the least, but also suffers from the worst noise of any of the cameras in this test group. The GF2 handles noise far better than the GF1 and E-P1, but at a penalty to overall color accuracy—most likely as a result of the camera’s demosaicing and noise reduction algorithms.
{{comparison_bars title="Color Score Comparison", attribute="Color Score", xLabel="Color Score"}}
Color Modes
{{section_header}}{{section.name}}{{/section_header}}
The Panasonic GF2 offers eight color modes and a custom mode that allows for adjustments to color, brightness, saturation, and sharpness. In the menu is also a "Picture Adjust" setting available that, oddly enough, adjusts your picture. This is available in the manual, program, and priority modes with the ability to make slight changes to sharpness, color contrast, and noise reduction. It also has the ability to work as a black and white filter.
Some of these modes provide fun alternatives, but the effects are rarely subtle. The addition of the multiple custom options are an added benefit if you find the camera consistently providing images that are not to your liking.
White Balance
{{section_header}}{{section.name}}{{/section_header}}
The GF2 performed on par with the test group, though its score did dip somewhat from the GF1, which blew the field away in white balance accuracy.
We feared that testing with the 14mm kit lens would skew the results, but the primary difference in score between the GF2 and GF1 was the result of how the two cameras interpreted incandescent lighting. We’re not sure why the GF2 struggled with incandescent lighting, but we feel we can rule out the lens’ impact.
Automatic White Balance ({{product.raw_scores['Auto White Balance Score']}})
The GF2’s automatic white balance performed best under daylight conditions, where it nearly matched the custom white balance setting taken with a white card. It had an average error of just under 175 kelvin below the proper color temperature, which is quite good.
Incandescent light typically gives automatic white balance modes (and even custom white balance modes) quite a fit—they rarely get it perfect. That was also true in this case, where the GF2 produced an average error of 1172 kelvin.
Under the automatic white balance setting, compact white fluorescent light didn’t cause too many problems. The GF2 produced an average error of less than 100 kelvin, which caused only a slight warming effect under indoor lighting.
Custom White Balance ({{product.raw_scores['Custom White Balance Score']}})
As is often the case, custom white balance on the GF2 is a far more accurate method of getting the camera to determine what is white. This certainly shows, and the camera produced an average error of just 100-200 kelvin across all three light settings.
In total, the GF2 performed on par with the other cameras in the test group. The GF1 beat every other camera by a considerable margin. This is due to the fact that the GF1 handled tungsten/incandescent light particularly well—producing an average error of just over 300 kelvin—while the other cameras typically were off by more than 1000 kelvin.
The GF2 couldn’t match its predecessor, but outperformed the NEX-5 and NX100. The GF2 did fall short of the E-P1, which scored very well on both automatic and custom white balance.
{{comparison_bars title="White Balance Score Comparison", attribute="White Balance Score", xLabel="White Balance Score"}}
White Balance Options
{{section_header}}{{section.name}}{{/section_header}}
The GF2 allows users to save two custom white balance presets, handy if they frequently face the same challenging lighting conditions such as a hockey rink or basketball court. The GF2 also provides the ability to set color temperature according to the Kelvin scale.
The camera also has six white balance presets—daylight, shade, cloudy, incandescent, and flash—which allow it to cope specifically with different types of lighting.
Long Exposure
{{section_header}}{{section.name}}{{/section_header}}
The GF2 features an in-camera long exposure noise reduction option, designed specifically to combat noise in longer shutter speeds. It does this, as many cameras now do, by taking your photo and then a second “dark” shot with the shutter closed. The second shot (theoretically) should allow the camera to guess what is noise and what is your image. Unfortunately, noise is inherently random and this approach can be hit or miss.
In the GF2’s case, as was true with the GF1, it missed. In many cases, the long exposure noise reduction actually made things worse. Long exposure noise reduction produced little visible difference. Worse, the noise reduction feature requires a second equally-long exposure, so taking a 30 second shot now takes a minute—with no great benefit. More on how we test long exposure.
The noise reduction feature did help in terms of color accuracy on long exposures, with the NR feature reining in the GF2’s oversaturation a bit. Saturation can really produce a very attractive photo, but it’s much better to get an accurate image first and worry about making the colors pop in post-processing.
The GF2 handled long exposure noise very well, as it did in the other noise tests. The noise reduction feature did little to actually reduce noise, but the camera largely kept it to a minimum regardless of whether the feature was activated or not.
Lengthy exposures typically create quite a bit of noise, but the GF2 kept it in check with average noise totals of less than 1.5%—even at 30 seconds. This was better than the GF1, but lagged a bit behind the Sony NEX-5 with its larger sensor.
The GF2 scored fairly well in our tests for noise, though an overall lack of color accuracy hurt its total score. Compared to the others in the test group, it was middle of the pack—handling noise far better than the GF1 except for a small dip in color accuracy.
The king of the heap here was really the Samsung NX100, with the Sony NEX-5 right behind. This is to be expected, especially given that both of these cameras have APS-C sensors. Such an increase in sensor size is a major benefit for long exposures, as the camera can gather much more information per pixel. With such a volume of real image data, the end result isn’t as susceptible to being poisoned by the interference in the sensor as it records the image.
{{comparison_bars title="Long Exposure Score Comparison", attribute="Long Exposure Score", xLabel="Long Exposure Score"}}
Noise Reduction
{{section_header}}{{section.name}}{{/section_header}}
The GF2 provides quite a few noise reduction options. It has a long exposure noise reduction setting that we found to be largely ineffectual, as well as the ability to set noise reduction from a level of -2 to +2. The ability to adjust noise reduction is only available in the “Picture Adjust” setting in program, manual, and priority modes.
This is a good deal of control, but it would be better if the camera had a more obvious noise reduction setting that was right in the menu as opposed to hidden in the Picture Adjust sub-menu.
The GF2 suffers more from luma noise than chroma noise, especially at higher ISOs—typical for most digital cameras. In our tests, the GF2 was able to keep luma noise to a respectable 1.6% at ISO 3200, though it went up to more than 2.8% at the maximum setting.
The only real issue the camera seemed to have was processing blues and reds at ISO 400, resulting in higher noise levels at that ISO than ISO 800. We noticed something similar in the GF1, but not to this degree. It’s more likely an issue with the camera’s processing than the sensor itself; the variance was small enough that it’s little cause for concern.
The GF2 fared well even with NR at its default setting, though some correction is still applied due to the GF2’s JPEG compression. Still, it outpointed every other camera but the NEX-5 and Samsung NX100 at the low ISOs and even managed to match the NEX-5 at ISO 3200 and 6400—all the while preserving more dynamic range than the GF1 did at high ISOs. More on how we test noise.
ISO Options
{{section_header}}{{section.name}}{{/section_header}}
The GF2 features Auto ISO and Intelligent ISO settings with a range of 100-6400: a one stop improvement over the GF1. It doesn’t feature any extended ISO settings, so what you see is what you get. The GF2 does allow you to select from 1/3rd increments in ISO, offering a great deal of fine control in that regard. If you’re more the auto ISO type, then you can set a maximum ISO of 200, 400, 800, or 1600.
The camera’s Intelligent ISO feature is designed to detect if subject movement dictates a faster shutter speed and adjust accordingly. It’s not re-inventing the wheel, but without a manual ISO dial it will at least help when you need to quickly up your sensitivity or risk losing a shot. This is all assuming, of course, that the camera understands what’s going on, which isn’t always the case.
Dynamic Range
{{section_header}}{{section.name}}{{/section_header}}
The GF2 preserves dynamic range well across the ISO range. The biggest news here is that Panasonic has managed to squeeze significantly better performance out of the same sensor as the GF1. At mid-range ISOs the improvement was nearly a full stop, while at ISO 3200 the improvement was a full stop and a half.
This is impressive given the amount of noise suppression that the GF2 applies at nearly every setting. The GF2 is able to keep noise levels low without losing much image quality. More on how we test dynamic range.
Below you’ll see a comparison chart of the GF2’s dynamic range scores up against the GF1, Sony NEX-5, Samsung NX100, and Olympus E-P1.
The real winner here is the Sony NEX-5, which blows the field away, preserving more than five stops of dynamic range even as high as ISO 3200. At its lowest setting of ISO 200, the NEX-5 keeps a full 7.71 stops of range in our tests. Most of the other cameras in our group could not even break six stops, but the NEX-5 accomplishes that without breaking a sweat.
The GF2 is the second closest here, showing significant improvement over the GF1.
{{comparison_bars title="Dynamic Range Score Comparison", attribute="Dynamic Range Score", xLabel="Dynamic Range Score"}}
Noise Reduction
{{section_header}}{{section.name}}{{/section_header}}
The GF2 provides quite a few noise reduction options. It has a long exposure noise reduction setting that we found to be largely ineffectual, as well as the ability to set noise reduction from a level of -2 to +2. The ability to adjust noise reduction is only available in the “Picture Adjust” setting in program, manual, and priority modes.
This is a good deal of control, but it would be better if the camera had a more obvious noise reduction setting that was right in the menu as opposed to hidden in the Picture Adjust sub-menu.
The GF2 suffers more from luma noise than chroma noise, especially at higher ISOs—typical for most digital cameras. In our tests, the GF2 was able to keep luma noise to a respectable 1.6% at ISO 3200, though it went up to more than 2.8% at the maximum setting.
The only real issue the camera seemed to have was processing blues and reds at ISO 400, resulting in higher noise levels at that ISO than ISO 800. We noticed something similar in the GF1, but not to this degree. It’s more likely an issue with the camera’s processing than the sensor itself; the variance was small enough that it’s little cause for concern.
The GF2 fared well even with NR at its default setting, though some correction is still applied due to the GF2’s JPEG compression. Still, it outpointed every other camera but the NEX-5 and Samsung NX100 at the low ISOs and even managed to match the NEX-5 at ISO 3200 and 6400—all the while preserving more dynamic range than the GF1 did at high ISOs. More on how we test noise.
ISO Options
{{section_header}}{{section.name}}{{/section_header}}
The GF2 features Auto ISO and Intelligent ISO settings with a range of 100-6400: a one stop improvement over the GF1. It doesn’t feature any extended ISO settings, so what you see is what you get. The GF2 does allow you to select from 1/3rd increments in ISO, offering a great deal of fine control in that regard. If you’re more the auto ISO type, then you can set a maximum ISO of 200, 400, 800, or 1600.
The camera’s Intelligent ISO feature is designed to detect if subject movement dictates a faster shutter speed and adjust accordingly. It’s not re-inventing the wheel, but without a manual ISO dial it will at least help when you need to quickly up your sensitivity or risk losing a shot. This is all assuming, of course, that the camera understands what’s going on, which isn’t always the case.
Focus Performance
{{section_header}}{{section.name}}{{/section_header}}
The GF2, like most mirrorless cameras, works utilizing a contrast detection system to achieve focus. These systems work by detecting when the edges in a focal point are at their sharpest, offering the greatest amount of contrast between the subject and background. It offers 23 selectable focal points as either a single point or as an array. The GF2 also offers motion tracking, face detection, and the ability to touch the screen to select a focal point.
The GF2 allows the user to choose between continuous autofocus, one-time autofocus, and manual focus with the option of a digital zoom to assist the user in focusing correctly. The loss of a button to quickly switch between auto and manual focus is a bit of a disappointment, but the Function button is programmable to assume that capability.
Focus is quite snappy and works even against painted walls that offer no real edges to focus on.
The Panasonic GF2 allows shooters to select a 23-point array or one specific focus area of a customizable size.
The camera integrates touchscreen functionality as well, allowing users to point out an area they want in focus. The GF2 can even adjust its scene mode the touchscreen selection. For instance, if the user chooses to focus on scenery instead of a person the scene mode changes accordingly.
Long Exposure
{{section_header}}{{section.name}}{{/section_header}}
The GF2 features an in-camera long exposure noise reduction option, designed specifically to combat noise in longer shutter speeds. It does this, as many cameras now do, by taking your photo and then a second “dark” shot with the shutter closed. The second shot (theoretically) should allow the camera to guess what is noise and what is your image. Unfortunately, noise is inherently random and this approach can be hit or miss.
In the GF2’s case, as was true with the GF1, it missed. In many cases, the long exposure noise reduction actually made things worse. Long exposure noise reduction produced little visible difference. Worse, the noise reduction feature requires a second equally-long exposure, so taking a 30 second shot now takes a minute—with no great benefit. More on how we test long exposure.
The noise reduction feature did help in terms of color accuracy on long exposures, with the NR feature reining in the GF2’s oversaturation a bit. Saturation can really produce a very attractive photo, but it’s much better to get an accurate image first and worry about making the colors pop in post-processing.
The GF2 handled long exposure noise very well, as it did in the other noise tests. The noise reduction feature did little to actually reduce noise, but the camera largely kept it to a minimum regardless of whether the feature was activated or not.
Lengthy exposures typically create quite a bit of noise, but the GF2 kept it in check with average noise totals of less than 1.5%—even at 30 seconds. This was better than the GF1, but lagged a bit behind the Sony NEX-5 with its larger sensor.
The GF2 scored fairly well in our tests for noise, though an overall lack of color accuracy hurt its total score. Compared to the others in the test group, it was middle of the pack—handling noise far better than the GF1 except for a small dip in color accuracy.
The king of the heap here was really the Samsung NX100, with the Sony NEX-5 right behind. This is to be expected, especially given that both of these cameras have APS-C sensors. Such an increase in sensor size is a major benefit for long exposures, as the camera can gather much more information per pixel. With such a volume of real image data, the end result isn’t as susceptible to being poisoned by the interference in the sensor as it records the image.
{{comparison_bars title="Long Exposure Score Comparison", attribute="Long Exposure Score", xLabel="Long Exposure Score"}}
Video: Low Light Sensitivity
{{section_header}}{{section.name}}{{/section_header}}
With the 14mm f/2.5 lens, we set up the Panasonic GF2 and lowered the light continuously until the video no longer registered 50 IRE (a reasonably visible image) on a waveform monitor. For the GF2, this occurred at 6 lux, which is better than even some full-size DSLRs that we have tested, including the Nikon D5000.
Chromatic Aberration
{{section_header}}{{section.name}}{{/section_header}}
The GF2 fared well in our Chromatic Aberration tests at all three apertures with the 14mm pancake lens attached. It seemed to have the most trouble around the edges of the lens at high-contrast areas. In our real-world testing, this was hardly noticeable even when shooting notoriously difficult scenes, such as bare tree branches against a white sky.
Distortion
{{section_header}}{{section.name}}{{/section_header}}
The GF2 applies distortion correction to JPEG files and includes lens profile information within the RAW files. The included SILKYPix software uses that information to correct for distortion automatically. The result is that both JPEG and RAW files from the GF2 are virtually distortion-free.
In order to properly gauge the lens’ performance, we attached it to an Olympus E-PL2, which applied little or no distortion correction. We found that the 14mm Panasonic lens did have a fair amount of barrel distortion, requiring a manual correction of 50 out of 100 in DXO Optics Pro to regain parallel lines.
Since the GF2 corrects this distortion automatically, this is more academic than anything. If you use the 14mm kit lens on another Micro Four-Thirds camera, just know that some post-processing may be required.
Motion
{{section_header}}{{section.name}}{{/section_header}}
Motion performance is not always the strong suit of system cameras with CMOS sensors, as they aren’t designed for high definition video. The GF2 can record full HD at 1080/60i. Compression is achieved with now-common AVCHD codec, which can also be used to record at 720/60p. More on how CamcorderInfo tests motion.
The GF2 performed up to expectations, similarly to previous Micro Four-Thirds cameras from Panasonic. There is a fair amount of artifacting, ghosting, and color bleeding. Both pinwheels in the video above exhibit trailing and ghosting, especially between blues and greens and blacks and whites.
The only real difference between the GF1 and GF2—other than the framing due to the different lenses used in testing—is the GF2's ability to record 1080/60i video instead of just 720/30p. Both cameras produce very similar results, as they share the same sensor.
The Olympus E-P1 has slightly worse color bleeding and ghosting compared to the GF2, but does much better in maintaining smooth motion. Looking at the water fountain in the video above, the water looks much smoother in motion on the E-P1's video than in the GF2's video.
The NEX-5 is the only other camera in our testing group that can also record full HD 1080/60i videos. Again, you can see significant artifacting and trailing in the test video. One thing to note here is the sharpness in the black and white pinwheel, as the NEX-5 tested much better in that department than the GF2.
Video Sharpness
{{section_header}}{{section.name}}{{/section_header}}
The GF2 produced a horizontal sharpness of 500 lw/ph and vertical sharpness of 525 lw/ph in our testing. At times that score did improve up to 600 lw/ph, but only temporarily. This is a bit of a step down from the GF1, which recorded 575 lw/ph across the board. That’s a big disappointment, considering the GF2 records a higher definition image and should be able to preserve fine differences in detail better. More on how CamcorderInfo tests video sharpness.
{{comparison_bars title="Video Sharpness Score Comparison", attribute="Video Sharpness Score", comps="video", xLabel="Video Sharpness Score"}}
Low Light Sensitivity
{{section_header}}{{section.name}}{{/section_header}}
With the 14mm f/2.5 lens, we set up the Panasonic GF2 and lowered the light continuously until the video no longer registered 50 IRE (a reasonably visible image) on a waveform monitor. For the GF2, this occurred at 6 lux, which is better than even some full-size DSLRs that we have tested, including the Nikon D5000.
Usability
Buttons & Dials
{{section_header}}{{section.name}}{{/section_header}}
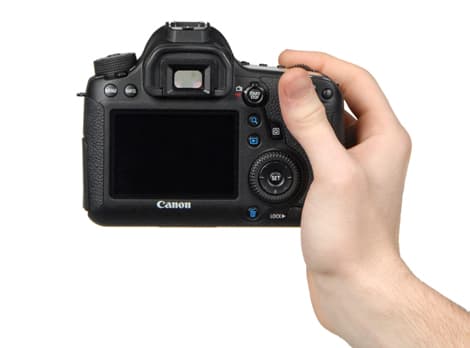
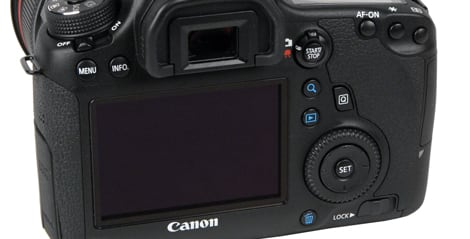
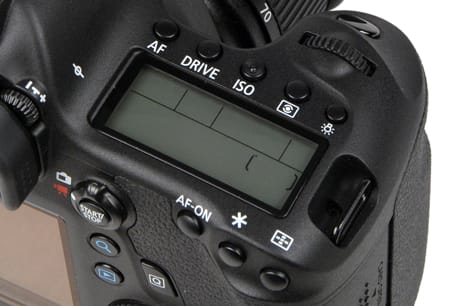
The controls on the GF2 are severely pared down from the GF1: the physical controls for AF/AE lock, AF/MF switch, drive mode, mode dial, DISP button, and preview/delete have been removed. All of these functions are still present, but they’ve been moved to the menu and are controlled via the 3’’ touchscreen interface.
The Quick Menu and Function keys have been combined on the rear of the GF2. Both are still easy to use, but unfortunately the button can only access one or the other. There are 15 slots in the Quick Menu that users can fill with settings they adjust the most. This kind of functionality would be nice to have separate from the function key, even though it is accessible through the touchscreen.
The rear control wheel has a fair amount of resistance to it, making fine adjustments easier and accidental movements a thing of the past. The only downside to this is when the user wants to make a drastic change, quite a few strokes of the dial are required.
The only real addition to the body is an illuminated Intelligent Auto button that sits right behind the shutter release and glows blue when activated. This can be activated from any mode and it conveniently switches to the camera’s automatic setting. It’s a clear sign that the GF2 is meant to appease a different crowd than the GF1. It’s a nice touch to encourage the amateur to root around in the menu without fear of screwing something up.
Menu
{{section_header}}{{section.name}}{{/section_header}}
The GF2’s main menu is divided into eight sections: record mode, record settings (vaguely titled just “REC”), video settings, custom, setup, and playback. Setup and playback handle the camera’s base functions and playback options, respectively. Record mode lets the user choose which shooting mode the camera is in. The different shooting options are available under the “REC” tab. Custom brings the user to a large menu of 28 different options for customizing the camera’s three savable custom shooting modes.
The camera’s options are laid out thoughtfully and intelligently in most cases, though a few of the finer adjustments are located in some odd menus. As a result, it’s not always clear whether an option will remain in effect if you were to change shooting modes.
Instruction Manual
{{section_header}}{{section.name}}{{/section_header}}
The supplied manual we received had several errors in both the table of contents and various diagrams, though the updated manual we found online had all these errors corrected. The environmentalists will be happy as the paper manual is quite slim compared to some other camera models, with the full operating instructions only available online in .PDF format.
The basic manual provides only rudimentary instructions, while the advanced manual for the GF2 is much more thorough. The latter provides detailed explanations of each shooting mode and many of the settings. These manuals will help you learn the camera’s particular features, but they won’t make you a better photographer.
Handling
{{section_header}}{{section.name}}{{/section_header}}
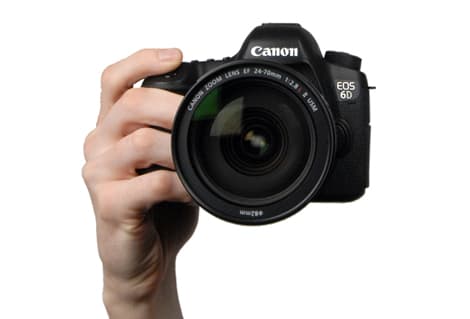
The GF2 handles very much like a point-and-shoot camera, especially with the 14mm f/2.5 pancake lens attached. It’s very lightweight at just 12.87 oz. with the pancake lens, and is a pleasure to shoot with for extended periods of time.
The body’s lack of weight and size does work against it with a zoom lens attached. With a weightier lens attached, the body is not substantial enough to balance properly when composing. However, the camera is aimed more at those looking to jump up from a point-and-shoot. With that in mind, the Panasonic GF2 delivers from a design perspective.
Buttons & Dials
{{section_header}}{{section.name}}{{/section_header}}
The controls on the GF2 are severely pared down from the GF1: the physical controls for AF/AE lock, AF/MF switch, drive mode, mode dial, DISP button, and preview/delete have been removed. All of these functions are still present, but they’ve been moved to the menu and are controlled via the 3’’ touchscreen interface.
The Quick Menu and Function keys have been combined on the rear of the GF2. Both are still easy to use, but unfortunately the button can only access one or the other. There are 15 slots in the Quick Menu that users can fill with settings they adjust the most. This kind of functionality would be nice to have separate from the function key, even though it is accessible through the touchscreen.
The rear control wheel has a fair amount of resistance to it, making fine adjustments easier and accidental movements a thing of the past. The only downside to this is when the user wants to make a drastic change, quite a few strokes of the dial are required.
The only real addition to the body is an illuminated Intelligent Auto button that sits right behind the shutter release and glows blue when activated. This can be activated from any mode and it conveniently switches to the camera’s automatic setting. It’s a clear sign that the GF2 is meant to appease a different crowd than the GF1. It’s a nice touch to encourage the amateur to root around in the menu without fear of screwing something up.
Display(s)
{{section_header}}{{section.name}}{{/section_header}}
The LCD is a 3-inch 460k touchscreen LCD. It is sharp enough to pick up some fine details and confirm focus, though it does tend to oversaturate a little. Saturation can be turned down in the menu along with contrast, brightness, and red/blue tint. There are four available brightness settings.
The touch LCD works well and is as responsive as most other digital camera touchscreens. You shouldn’t expect tablet-level control here, but it’s functional and the buttons are large enough that it’s rare to have any real control issues. The LCD is only barely visible in direct sunlight—not uncommon among LCDs.
Viewfinder
{{section_header}}{{section.name}}{{/section_header}}
The GF2 does not come with a viewfinder, but does support an optional electronic viewfinder by its rear port and hot shoe.
Image Stabilization
{{section_header}}{{section.name}}{{/section_header}}
We have not tested image stabilization for the DMC-GF2, as neither the camera nor the pancake kit lens (14mm f/2.5) feature image stabilization. The optional 14-42mm f/3.5-5.6 kit lens available with the GF2 will stabilize, as will other Micro Four-Thirds lenses.
Shooting Modes
{{section_header}}{{section.name}}{{/section_header}}
The GF2’s shooting mode dial is accessible only through the main menu. The shooting modes are all laid out on the main screen: Program Auto, Aperture Priority, Shutter Priority, Manual, iAuto, My Color, Scene, and Custom. My Color replaces what would typically be “film modes” or “picture effects” in other models. The custom mode allows the user to choose one of three custom settings. Each setting has 28 different options for the user to select and save for later use.
Focus
{{section_header}}{{section.name}}{{/section_header}}
The GF2, like most mirrorless cameras, works utilizing a contrast detection system to achieve focus. These systems work by detecting when the edges in a focal point are at their sharpest, offering the greatest amount of contrast between the subject and background. It offers 23 selectable focal points as either a single point or as an array. The GF2 also offers motion tracking, face detection, and the ability to touch the screen to select a focal point.
The GF2 allows the user to choose between continuous autofocus, one-time autofocus, and manual focus with the option of a digital zoom to assist the user in focusing correctly. The loss of a button to quickly switch between auto and manual focus is a bit of a disappointment, but the Function button is programmable to assume that capability.
Focus is quite snappy and works even against painted walls that offer no real edges to focus on.
The Panasonic GF2 allows shooters to select a 23-point array or one specific focus area of a customizable size.
The camera integrates touchscreen functionality as well, allowing users to point out an area they want in focus. The GF2 can even adjust its scene mode the touchscreen selection. For instance, if the user chooses to focus on scenery instead of a person the scene mode changes accordingly.
Recording Options
{{section_header}}{{section.name}}{{/section_header}}
The GF2 offers five quality options in three sizes: RAW, RAW+JPEG (fine or normal), and JPEG alone (fine or normal) in 3-megapixel, 6-megapixel, and 12-megapixel varieties when shooting the 4:3 ratio.
There are also three other aspect ratios available (1:1, 16:9, and 3:2), but these all limit image resolution at a maximum of 9MP in 16:9 and 1:1, and 10.5MP in 3:2.
Other Controls
{{section_header}}{{section.name}}{{/section_header}}
Intelligent Resolution
The GF2 does feature an “Intelligent Resolution” option that will attempt to increase image sharpness and clarity. It has four settings (off, low, medium, high) and is effective to a certain degree. The 14mm lens used in testing was already rather sharp but the feature did help to better highlight details along the edge of the lens by applying some in-camera sharpening where it detected edges while preserving smooth gradation in color areas.
Picture Adjust
The GF2 allows the user to make slight adjustments to sharpness, contrast, saturation, and noise reduction through its Picture Adjust setting, available only in program, manual, and priority modes.
Speed and Timing
{{section_header}}{{section.name}}{{/section_header}}
The GF2 captures images in 3-5 shot bursts at its highest rate before slowing down to a more pedestrian speed of about one frame per second.
The GF2 takes only a moment to spring to life and while we don’t test specifically for start-up to first shot, the GF2 was pretty snappy in terms of how quickly we were able to shoot after turning it on. For an added boost of speed, the camera will put itself into sleep mode and it’s usually ready to shoot immediately—though it will have to adjust its focus and metering depending on what setting you have the camera on.
Like the mode dial, the drive switch has also been removed from the top of the GF2. The drive mode button is now on the rear control pad with an option available for single shooting, high-speed burst w/o live view, and medium or low speed burst shooting with live view enabled between shots.
The Panasonic GF2 is not the fastest shot on the block, as we were only able to get around 2.45 frames per second when shooting at the highest quality JPEG. It performed similarly when firing off RAW shots as well, but in both cases the rate was maintained only for the first 3-5 shots before the buffer wore thin.
The GF2 combines the self-timer button with the drive mode button. Pressing this button brings up an option to choose high-speed shooting and bracket shooting, as well as the self-timer with 2-second, 10-second, and 10-second/3-picture options available.
Focus Speed
{{section_header}}{{section.name}}{{/section_header}}
The GF2, like most mirrorless cameras, works utilizing a contrast detection system to achieve focus. These systems work by detecting when the edges in a focal point are at their sharpest, offering the greatest amount of contrast between the subject and background. It offers 23 selectable focal points as either a single point or as an array. The GF2 also offers motion tracking, face detection, and the ability to touch the screen to select a focal point.
The GF2 allows the user to choose between continuous autofocus, one-time autofocus, and manual focus with the option of a digital zoom to assist the user in focusing correctly. The loss of a button to quickly switch between auto and manual focus is a bit of a disappointment, but the Function button is programmable to assume that capability.
Focus is quite snappy and works even against painted walls that offer no real edges to focus on.
The Panasonic GF2 allows shooters to select a 23-point array or one specific focus area of a customizable size.
The camera integrates touchscreen functionality as well, allowing users to point out an area they want in focus. The GF2 can even adjust its scene mode the touchscreen selection. For instance, if the user chooses to focus on scenery instead of a person the scene mode changes accordingly.
Features
Other Features
{{section_header}}{{section.name}}{{/section_header}}
Optional 3D Lens
The GF2 is compatible with Panasonic’s 3D lens, the LUMIX G 12.5mm / F12 (Model No.: H-FT012), which will allow for shooting a stereoscopic 3D image that can be viewed on a 3D television. We don’t have this lens to test with, but it is certainly an option for you lovers of the third dimension.
The 3D lens is available at an MSRP of $259.95.
Recording Options
{{section_header}}{{section.name}}{{/section_header}}
The GF2 shoots 1080/60i AVCHD video—as opposed to the GF1’s 720/30p AVCHD Lite. AVCHD is not the ideal codec, but it certainly gets the job done with a bitrate of either 17bps or 13mbps. At 720p the GF2 does record a full 60 progressive frames per second.
Video Controls
{{section_header}}{{section.name}}{{/section_header}}
There’s not much in the way of manual controls available during video recording. The camera does have adjustable ISO, but that setting is only in the regular “REC” menu and the GF2 will revert to automatic ISO sensitivity when recording video.
The camera’s “Flicker Reduction” option does allow users to choose from a handful of fixed shutter speeds, ranging from 1/50 to 1/120.
Auto Controls
When shooting still photos, Intelligent Auto allows the GF2 to automatically select from most of the scene modes available to it. When the movie record button is pressed, however, the GF2 will choose from one of four scene settings: Macro, Portrait, Scenery, or Low Light.
The GF2 also allows users to shoot automatically in any of the My Color modes and Program mode. There is not as much control over record settings in Program mode as there is for still photography. For instance, exposure compensation is not available in Program mode during video recording.
Zoom
As this is a system camera, the zoom ratio and zoom controls depend entirely on the lens attached to the camera. The lens in this case was a pancake prime and thus had no zoom ratio.
Focus
As the GF2 relies on a contrast detection autofocus system and autofocus is fully available while recording video. There is a slightly audible motor sound on video played back, as the stereo mic on the camera picks up the sounds of the focusing motor. That problem can be alleviated by using manual focus during video recording.
Exposure Controls
Aperture and shutter speed are both available during video recording in limited capacity. Aperture is set prior to recording a video and will only change if the lens is zoomed to a point where that aperture is no longer available. Shutter speed is available in the Flicker Reduction menu option for movie recording.
Other Controls
Automatic ISO takes over during movie recording, regardless of any user-selected setting.
Audio Features
{{section_header}}{{section.name}}{{/section_header}}
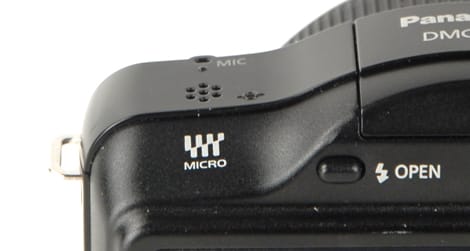
The GF2 features a stereo mic, upgraded from the GF1’s monaural microphone. There is no external microphone input. The GF2 does provide an on-screen level guide for audio, so you’ll know when you’re being too soft or too loud during recording.
In the Box
{{section_header}}{{section.name}}{{/section_header}}

Depending on which kit you choose the camera will come with a 14mm F/2.5 pancake lens and/or 14-42mm f/3.5-5.6 lens, as well as:
- USB Cable (proprietary)
- A/V Cable (proprietary)
- Neck Strap
- DMW-BLD10PP Lithium Ion Battery
- Battery Charger
- Body Cap/Lens Cap(s)
- Hot Shoe Cover
- Manuals
- Software
Meet the tester
TJ is the former Director of Content Development at Reviewed. He is a Massachusetts native and has covered electronics, cameras, TVs, smartphones, parenting, and more for Reviewed. He is from the self-styled "Cranberry Capitol of the World," which is, in fact, a real thing.
Checking our work.
Our team is here to help you buy the best stuff and love what you own. Our writers, editors, and experts obsess over the products we cover to make sure you're confident and satisfied. Have a different opinion about something we recommend? Email us and we'll compare notes.
Shoot us an email