Here's how to get the most out of your fancy new gaming monitor
Those features don’t just turn themselves on
 Credit:
Reviewed / Matthew S. Smith
Products are chosen independently by our editors. Purchases made through our links may earn us a commission.
For a lot of gaming PC upgrades, you can simply plug in the new component and enjoy the improvements. Installing a new graphics card will increase in-game frame rates, adding another RAM stick will increase your available memory, and a new CPU with more cores will give you more processing power. But not everything works so easily or comes with all of its features turned on by default. While you might think a high-end gaming monitor plugged into a PC would immediately let you take advantage of all the capabilities it's offering, that’s far from reality.
There are a lot of steps to getting the most out of a new monitor. That includes making sure you’ve got the right cables, adjusting settings on your PC, and even diving into some of the settings on the monitor. If you want to enjoy your new monitor's high refresh rate, increased resolution, HDR, and more, we’ll walk you through what you’ll need to do.
Check your connections

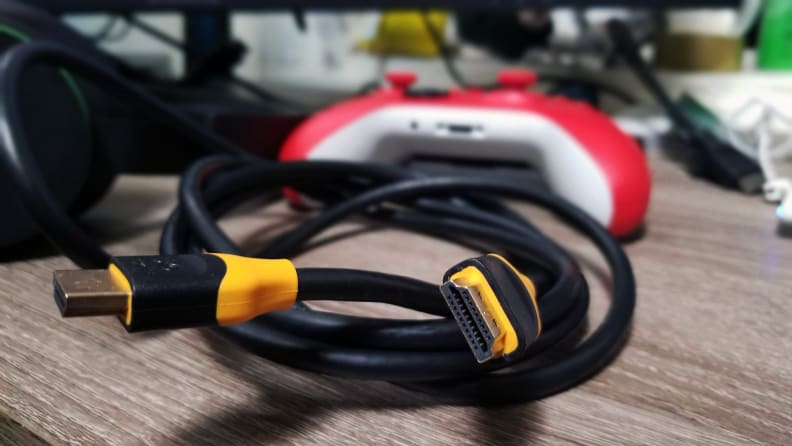
This Cable Matters 3-pack of HDMI 2.1-compliant cables is our top pick right now.
Your monitor’s features don’t come only from the monitor itself—you need to have a computer and a cable that support them. If you try enabling 4K a resolution and 120Hz refresh on an old computer with an HDMI 1.2 port, it’s not going to work. Even if you have a capable computer and monitor, you could also run into problems if you’re using a cable that’s not up to spec. Though lower-spec cables can still carry a signal between your devices, your capabilities will be limited by the weakest link in the chain.
You may want to get familiar with HDMI and DisplayPort standards, as your computer and monitor will likely have either one or both of those connections. To find out what ports are available on your computer and monitor, head over to the manufacturers’ website. You should be able to find specifications on what resolution and frame rate combinations are supported by each port, such as 4K/120Hz on HDMI 2.1 or 1440p/240Hz on DisplayPort 1.4.
Sometimes a system may only support its max resolution and refresh rate over one connection type. For example, your monitor could support 4K/144Hz over DisplayPort 1.4 but its HDMI port maxes out at 4K/60Hz. So, you’ll need a DisplayPort 1.4 port on your computer to make the most of this monitor.
Whichever connection you’re making, you’ll also need a cable that can meet the standard. DisplayPort cables are largely interchangeable, though VESA (the industry group behind a wide array of standards for consumer electronics) recommends choosing DisplayPort Certified cables to ensure quality. HDMI cables vary based on the standard they’re designed to meet. For example, you’d need an HDMI 2.1 cable to bridge the gap between an HDMI 2.1 port on your computer and an HDMI 2.1 port on your monitor.
Setting the resolution and refresh rate

Setting your display's resolution takes only three clicks—that's it!
Once you have the hardware connections sorted, the first thing you’ll want to do is get the two big pieces of the puzzle in place: your resolution and frame rate.
Thankfully, these are incredibly easy to get adjusted in Windows’ settings. To start:
- Right-click on your desktop and select Display Settings.
- In the new window, scroll down to find the section labeled Scale and layout.
- Open the Display resolution drop-down menu and select your monitor’s native resolution.
To adjust your refresh rate and increase the smoothness of visuals in motion, you can continue from the same screen you used to change your resolution:
- Scroll down further and click on Advanced Display Settings.
- Under the heading Refresh Rate (or Choose a refresh rate in Windows 11) select your monitor’s maximum refresh rate.
Enable your monitor’s VRR technology

G-Sync is Nvidia's VRR technology.
If you have a display that supports a Variable Refresh Rate (VRR), a technology that will match your display’s refresh rate with the framerate your graphics card puts out, usually offered as either G-Sync or FreeSync, you’ll want to make sure this feature is enabled. In some cases, it can be enabled automatically, but going through the process manually will let you ensure you’re reaping its benefits, which include cleaner visuals without screen tearing (when a monitor tries to display multiple frames over a single refresh) or stuttering.
If you have an Nvidia graphics card, you’ll be looking to enable G-Sync. If you’re connected via HDMI, you’ll first need to go into your monitor's settings to enable VRR—the steps for this process will depend on your display. After that the steps for enabling the feature over HDMI and DisplayPort connections are mostly the same and will be performed on your computer:
- Right-click on the desktop and select Nvidia Control Panel (For Windows 11: You’ll have to select Show more options first, before seeing the Nvidia Control Panel option).
- Select Display from the menu on the left in the new window.
- Click Set up G-Sync on the left-side menu.
- Check Enable G-Sync, G-Sync Compatible from the first set of options.
- Choose the display you’re setting up from the second set of options.
- Check Enable settings for the selected display model from the third set of options.
If you have more than one display connected, you may need to select which display you’re enabling G-Sync for. You can find more details on the process here.

FreeSync is AMD's VRR technology.
For FreeSync you’ll need an AMD graphics card, you’ll first need to ensure AMD FreeSync is enabled on your monitor, anti-blur is disabled, and the DisplayPort version used is set to 1.2 or higher. Again, this process will vary depending on your monitor. Once these are set, you can enable FreeSync on your computer this way:
- Right-click on the desktop and select AMD Radeon Software (For Windows 11: You’ll have to select Show more options first, before seeing the AMD Radeon Software option)
- Select Display from the top menu in the new window
- Check that AMD FreeSync is turned on for your desired display
You should note that the two technologies are proprietary and not entirely interoperable. In many cases, you’ll be able to turn on G-Sync on your computer and use it with a FreeSync monitor (this is called G-Sync Compatible), but you won’t find such support when trying to enable FreeSync on your computer with a true G-Sync monitor.
Color boost
If you bought a monitor that supports HDR and an increased color bit-depth, those aren’t going to come running on your PC by default either.
To enable HDR on your system in Windows 10:
- Right-click on your desktop and select Display Settings.
- Click on Windows HD Color Settings under the heading Windows HD Color.
- Under Choose display select the monitor you’re setting up from the drop-down menu.
- Toggle on the switch under Use HDR.
To enable HDR on Windows 11, you can just use the keyboard shortcut Windows Key + Alt + B:
- Right-click on your desktop and select Display Settings.
- Choose the display you’re setting up.
- Toggle on the switch for Use HDR.
Keep in mind that you’ll also need to turn on HDR in your games (and not all games support HDR) and may need to turn it on in your monitor’s settings to see this work. If your screen looks washed out after enabling HDR, it’s likely your monitor or game that needs adjusting.
Supposing your monitor also supports a deeper color bit depth alongside its HDR, you can enable that in your graphics settings.

If your PC and monitor are HDR compatible, turn it on for even better graphics in your games (assuming they too support HDR, of course!)
For an Nvidia machine:
- Right-click on the desktop and select Nvidia Control Panel.
- Select Display from the menu on the left in the new window.
- Select Change resolution from the menu on the left.
- Select the display you’re setting up at the top of the page.
- Under Apply the following settings, select Use NVIDIA color settings and choose the highest option available (e.g. 10 bpc) in the drop-down menu for Output color depth.
For an AMD machine:
- Right-click on the desktop and select AMD Radeon Software.
- Select Display from the top menu in the new window.
- Select the display you’re setting up from the first options.
- Find the Color Depth drop-down menu and select the highest option available (e.g. 10 bpc).
Once you’ve got your monitor and all of its features set up, it’s time to jump in and enjoy your games to their fullest. If you’ve set everything up and something still seems off, you may want to double-check your settings. We’ve seen Windows sneakily change our refresh rate, and some games may have frame-rate caps or their own setting for refresh rate, so stay vigilant.


