Products are chosen independently by our editors. Purchases made through our links may earn us a commission.
Every meal you cook has an extra chore attached to it: washing the dishes. Think of a typical dinner. You’re probably exhausted from getting a meal on the table and making sure everyone actually eats it (hello, fellow parents). Then mealtime is over, leaving behind a seemingly endless pile of plates, silverware, glasses, pots, and pans in its wake. The gross, crusty dishes are standing between you and the rest of the evening.
Even if there’s a dishwasher in your kitchen, you’re not off the hook. Some things will always need hand washing. The American Cleaning Institute recommends it for china, some glassware, wooden items, aluminum utensils, and anything with a gold rim. You may also end up hand washing anything covered with oatmeal or melted cheese, because they may not clean up completely in the dishwasher. Plus, your cast iron or non-stick pans shouldn’t go in the dishwasher at all.
So, whether or not you have a dishwasher, you need to know how to hand wash.
Before we unpack the process, let’s establish some do’s and don’ts:
- Do save time by washing prep dishes and utensils while you prepare the meal.
- Don’t wait too long to start cleaning the dishes. Dried food is harder to remove.
- Do scrape food from dishes into the trash before you start washing.
- Don’t wash dishes until you’ve soaked them in hot, sudsy water for 15 minutes to an hour.
- Do rinse everything in clean, running water.
What You Need:
- A clean sink or dishpan
- A sponge or brush
- Liquid dish detergent
- Dish rack
- Gloves (recommended)
- Apron (optional)
- Dishtowels (optional)
Time Needed
Depends on the number of dishes
Difficulty
Easy
Step-by-Step:
1. Start with a clean sink or dishpan.
There’s no point in washing dishes in a dirty sink, so make sure it’s clean before you start on the dishes.
Pro tip: Baking soda is a mild abrasive that cleans without scratching.
2. Prepare the sink or dishpan by filling it about half way with hot, soapy water.
Pro tip: Start with about a tablespoon of hand dishwashing detergent and swirl it around to dissolve it and work up some suds. Dump the dirty water and start a new batch when it gets cold or the suds are gone.
3. Stack dirty pots, pans, and dishes with the heaviest items on the bottom.
Heavy pots and pans are less likely to damage fragile items when they’re at the bottom of the pile. They are also likely to need more soaking, so it’s good to get to them last.
4. Make sure you use a clean sponge.

Always use a clean sponge to scrub dishes, because a dirty sponge is a breeding ground for bacteria. Clean your sponge with a weak bleach solution and replace it often.
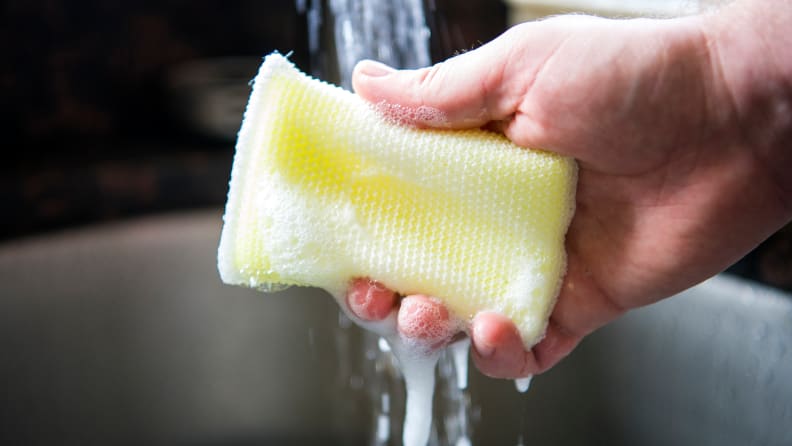
Wet the sponge with hot sudsy water and squeeze it out.
Pro tip: Since dish sponges are breeding grounds for bacteria, it’s a best practice to throw yours away and replace it with a new one every couple of weeks. In the meantime, disinfect your sponge weekly. Good Housekeeping recommends mixing 3/4 cup of bleach in a gallon of water and soaking the sponge in the solution for five minutes before rinsing.
5. Scrub and rinse the least dirty and most fragile items first.
Begin with silverware, glasses, and cups before moving on to plates, bowls, pots, and pans. As you wash each item, rinse it under a gentle stream of hot running water. Wear gloves to protect your hands from the heat and to give you a better grip on the dishes.
Pro tip: Better Homes & Gardens suggests adding a couple of ounces of vodka to dishwater to help clean greasy pans and plates.
6. Scrub the pots and pans.
After they’ve soaked, it can be easier to remove food residue from cooking pots and pans.
Pro tip: If you need to clean a burned pan, Merry Maids suggests adding a few drops of dish detergent to a cup of water and simmering it in the pan for about 10 minutes. Soak the pan overnight. Scrape out the gunk in the morning, then wash as usual.
7. Air dry the dishes on a drying rack.
You don’t have to dry dishes with a towel. In fact, it’s safer to air dry them, because dish towels harbor germs. Make sure the dishes are actually dry before you put them away to minimize bacterial contamination. If you need to clear dishes off the counter before they’re dry, wipe them with a fresh, clean towel.
Pro tip: If your dish rack didn’t come with a plastic tray, line a cookie sheet with a dish towel and place it underneath the rack to catch drips. Don’t use that damp towel again until you’ve washed it.
8. Clean the sink and counter.
Now, you're ready for the next load of dirty dishes.
Pro tip: When you're done with the dishes, clean the area around the sink, including the faucet and counter. Sears Home Services suggests cleaning granite counters with a spray made from a quarter cup of vodka and two drops of dish detergent, mixed with two cups of water.
And save yourself some of the vodka. The sooner you get the dishes done, the sooner you can move on to the rest of the evening.


