Here's how to connect a laptop to a TV
Use your little computer with the biggest display in your home.
 Credit:
Reviewed / Jackson Ruckar
Products are chosen independently by our editors. Purchases made through our links may earn us a commission.
We belong to an on-the-go culture. Our phone calls, emails, and the consumption of many forms of media can be done with an easily to carry, laptop computer or ultrabook: their tiny displays are a window to a far greater world.
Sometimes, however, the 13-inch display that you write those emails and take Skype calls with just doesn't feel large enough—especially at times when you're consuming content with friends. Fortunately connecting your laptop to a TV, using a wire or wirelessly, couldn't be easier.
It's an especially useful trick if you're working from home right now—read on.
Connect a laptop to a TV using a cable
Once upon a time, to connect a laptop to a television or external display you'd need to run a VGA cable between the two devices. If you wanted audio, too, you needed an additional 3.5mm cable to plug into your laptop's headphone port. Happily, things are easier now. Almost all modern TVs come with at least one HDMI (High Definition Multimedia interface) port. As a standard, HDMI is capable of carrying both high definition video and sound, on a single cable. Now for some great news: many recent laptops come equipped with an HDMI output built right into them.
Using an HDMI cable is the easiest and most reliable way to mirror your laptop's screen to your TV. (Mirroring means to have the same image on both screens.) Since we live in a high-def world, getting a high-speed cable that can send a 1080p (or greater) image from your computer to the TV is ideal. But don’t think that that means you’ll have to break the bank. We ran comprehensive tests on HDMI cables and found that cheap AmazonBasics cables worked just fine.
- An HDMI cable
- For recent MacBooks, a USB-C to HDMI Adapter
- For some Windows and Linux laptops, a Mini-HDMI or Mini DisplayPort-to-HDMI cable
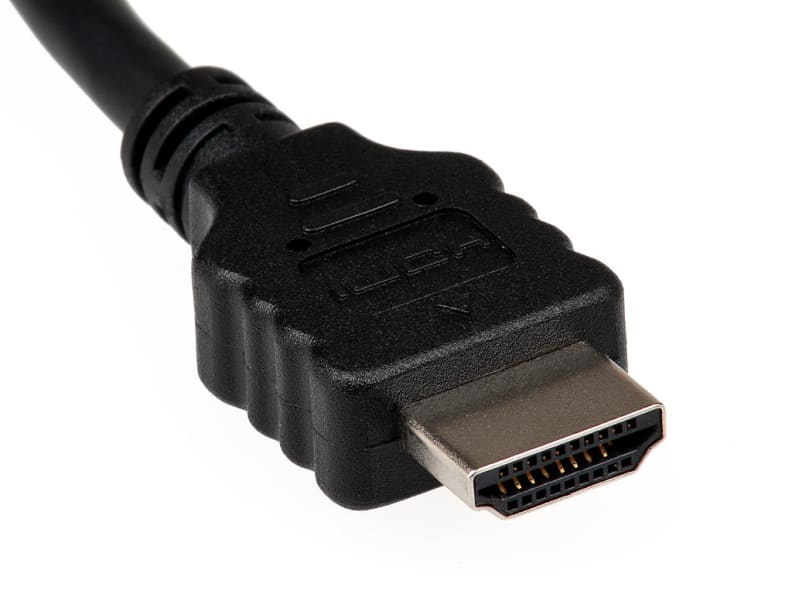
Want to connect a recent laptop to a recent TV? You're going to need a HDMI cable.
Step 1: Connect HDMI cable to laptop and TV
The order you connect them in isn't important: just make sure both ends of the cable are plugged in! If your laptop doesn’t have an HDMI port, you'll need an adapter or a cable with different end connectors. Newer Macbooks will need a USB-C to HDMI adapter that range between $15-20. Other less common connectors can usually be found with HDMI on one end and the other connection type on the other - such as Mini-HDMI or Mini DisplayPort for under $10 depending on length.
Step 2: Select the input on your TV
These are labeled at the physical connector on the TV and can be selected in the TVs on-screen menus, usually under Inputs or Picture.
Step 3: Adjust display settings, if necessary
Once the connection is complete and the proper input is selected you should be good to go. If you aren’t getting your computer screen image on your TV you might need to select the TV in your display settings.
- Mac: when the TV is connected, an AirPlay icon will appear on the right side of your menu bar near the battery icon. It looks like a box with a black triangle underneath it. Select this and choose the “Mirror TV Name” option.
- Windows: Left-click the Windows menu, type “Display,” and select “Change Display Settings.” There you can select your TV and change resolution if necessary to match your TVs resolution (720p, 1080p, or 4K).
With the right cables/adapters running between your laptop and your TV and the correct display settings your laptop, you should now be ready to use your television as a giant computer display.
Connect with Google Chromecast
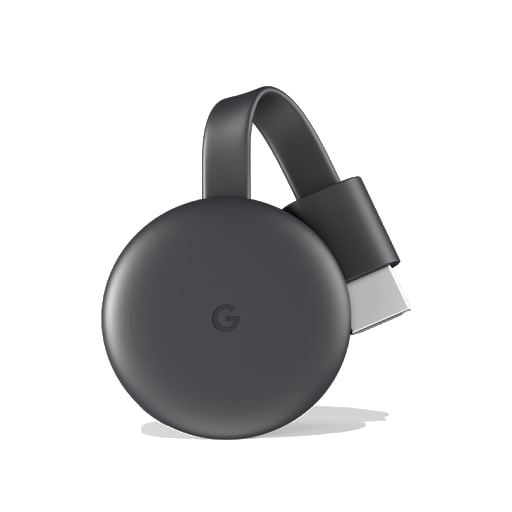
A Google Chromecast provides an inexpensive, easy way to wireless connect your laptop to a TV.
If you're not interested in being able to send everything on your laptop to that big screen TV in your living room, or prefer not to run an HDMI cable, using one of Google's inexpensive Chromecast devices could be a smart way to connect, instead. After downloading Google's Chrome web browser to your laptop, you'll be able to use a Google Chromecast to ‘cast’ tabs from your laptop's browser to your TV. This could be a video from YouTube, a browser-based game or your even your entire desktop. You can buy a Chromecast for as little as $35. More expensive models offer higher resolution and extra functionality.
If you own a smart TV, such as Vizio’s P-Series with SmartCast, a separate Chromecast device isn’t necessary. If you own a smart TV, double check on whether you need to invest in a Chromecast before running out to buy one.
Step 1: Connect the Chromecast to an HDMI input on your TV
Just plug it in. That's it... mostly. Some models of Chromecast also need to be connected to a USB port for power. If the one you own is one of those, it should have come with a microUSB cable and power adapter. If you need to buy either, we like these cables and this adapter.
Step 2: Select the proper input from your TV menu
Choose the input you plugged the Chromecast into with your TV’s on-screen menu. Once the proper input is selected, signal from the Chromecast will be displayed on screen.
Step 3: Set up your Chromecast online
Now that you can see what you're doing, using Google's Chrome browser, navigate to chromecast.com/setup to go through the set up process for your Chromecast and connect it to your WiFi network.
Step 4: Start streaming
Select the ‘Cast’ icon on your Chrome browser or in an app, such as YouTube, PLEX or Netflix, and select if you want to cast the browser tab or entire desktop, then select the Chromecast from the drop-down menu.
Connect via AppleTV
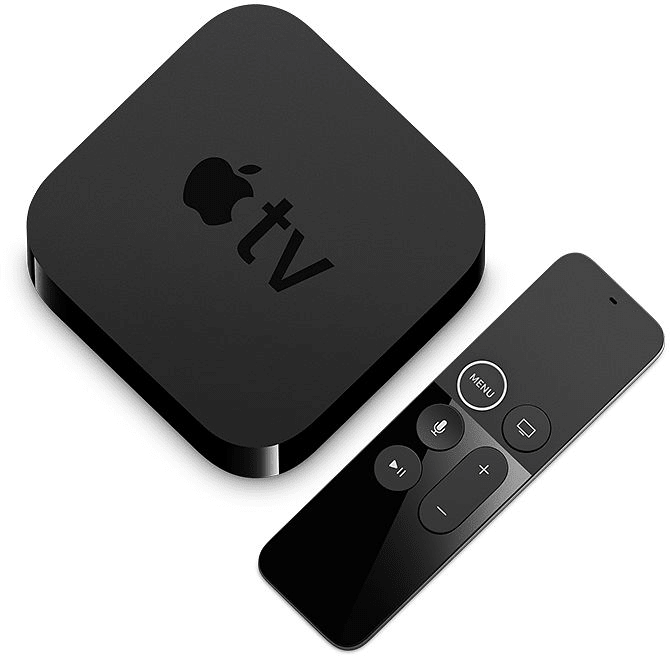
If you own an Apple laptop, connecting it to your TV wirelessly with an Apple TV couldn't be easier.
For Apple MacBook, MacBook Air or MacBook Pro users, investing in an Apple TV is the easiest, best way to wirelessly connect to a TV. One of the benefits of using Apple products exclusively is how well they work with one another. Apple TV fits into that ecosystem beautifully. Connections are quick and everything understands each other because they’re running on the same operating system. A base model Apple TV can be had for $149. But our recommended model is the slightly more expensive Apple TV 4K. In addition to allowing you to connect your laptop to your TV wirelessly, an Apple TV lets you stream any iTunes purchases you may have made and provides access to a wide variety of streaming services like HBO Now, Hulu and CBS All Access. You can even use it to play many popular iOS games.
Step 1: Connect the Apple TV to your TV with an HDMI cable
Plug your HDMI cable into the output on the back of your Apple TV and an input on your TV.
Step 2: Select the HDMI input through your TV menu
The HDMI input can be selected with either your remote or by using the buttons on your TV. They can usually be found along the bottom bezel or just around the back on the left or right side.
Step 3: Complete the Apple TV setup with the included remote or an iOS device
What won Apple their audience is the ease of use of their products. Once the Apple TV boots up, you’ll be led through the on-screen setup. If you run into any issues, an answer can be found through their support site.
Step 4: Choose the Apple TV from the AirPlay icon on your Macbook’s menu bar
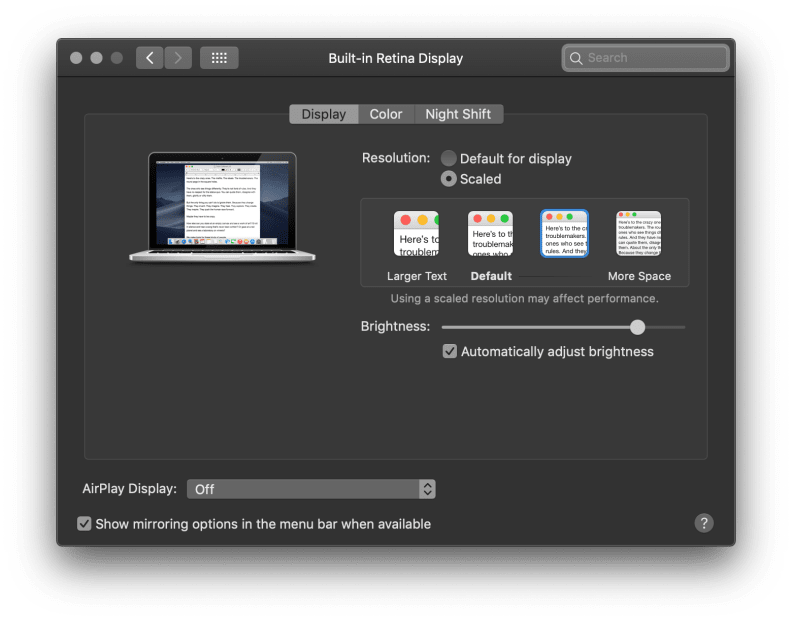
You can toggle your menu bar's AirPlay icon on or off via the System Preferences pane
So long as your MacBook and your Apple TV are both attached to the same wireless network, an AirPlay icon should appear in your MacBook's menu bar. If the AirPlay icon doesn’t appear, you can turn it on from your system menu. To do this, click the Apple icon in the top left corner of your laptop's display, select System Preferences from the drop down menu and then, click Display. Art the bottom of the preference pane that opens, you'll see a box marked 'Show mirroring options in menu bar when available.' click it. The AirPlay icon should now appear in your menu bar
In order to wirelessly connect your MacBook to your Apple TV, click the AirPlay icon and select your Apple TV. If you have a fast home router, your MacBook's screen should be displayed on your TV, almost instantly.

